Showing posts with label Sunday Sip and Share. Show all posts

Sunday, April 5, 2020

Sneaky Peek Week Day 6: 99 Cups of Coffee on the Wall...

Hello there inky friends!  Today is day 6 of Sneaky Peek Week at The Cat's Pajamas and we're sharing sneaks of the fun and funky "Silly Numbers" set!  With all the craziness happening right about now and all the coffee I've been going through lately, I thought I'd play a little twist on the "99 bottles of beer on the wall" theme.  Instead, I decided to use COFFEE...because, well, I've been drinkin' A LOT!  


I paired the numbers set up with the fun "This Could Be Vodka" set because if I had any right now, my coffee cup might just become a vodka cup.  LOL.  Just kidding.  I'm hanging in there and although I'm on day 23 of being home-bound, I'm doing pretty well keeping myself sane and occupied.  

Just a simple stamping with Versafine Clair Nocturne ink and some slight Copic coloring makes the numbers AND the cute cup stand out!  YUM!  Now I'm off to fill my coffee cup up with more java juice!  WOO!  

Make sure to hop over to the TCP Blog to check out my fellow teamie's projects and leave some love.  You just may win a $10 gift from TCP that you can use to buy more crafty stuff!  YAHOO!  


Sunday, November 17, 2019

Sunday Sip: Graciellie Designs Farmhouse Christmas!

Hello there inky friends!  It's Sunday Sip day at Coffee Loving Cardmakers blog and I'm sharing a pretty card I created using some of the newest digital stamp sets from Graciellie Design.

To create my pretty "Farmhouse Christmas" Spice Cocoa card, I combined two of Gracie's new sets:  Festive Wreath Mini Bundle and Cheery Cocoa Mini Bundle.  I just LOVE the images and the mix of fun sentiment fonts!  It's PERFECTLY PERFECT for the Christmas season!!!
To create my card, I colored the images with my Copic markers and then added some Glossy Accents to the pinecones and the center of each flower.  I also added a bit of shine to the cinnamon stick.
After coloring, I set the images aside and started working on the base layer.  I mounted a piece of kraft cardstock onto a white card base (topfold) and then flicked some black acrylic paint onto a kraft card panel and then attached some of my favorite burlap ribbon to the Farmhouse sentiment.  I then started layering all the pieces together and voila!  This beauty was complete!
Thanks so much for stopping over to check out my card today!  Hope you have a fabulous week!  See you again soon!

Sunday, November 3, 2019

Sunday Sip! Day 3 Coffee Lovers Blog Hop...Pink and Main!

Hello there coffee/tea/cocoa loving crafters!  It's Kerry here and I'm back with another Sunday Sip!  This week I'm celebratin' by sharing a card I created for Day 3 of the Coffee Lovers Blog Hop!  Are you loving the hop so far?  Have you been playing along?  We hope so!  My card today features products by Super Sponsor Pink and Main!
To create my card, I pulled out some yummy Pink and Main products:  Herringbone Stencil, Tea-rific stamp set and the Mum die set.  Mums are so perfect for the Fall season and I just love their pouffy flowers so much!
I colored the teapot image with Copic markers and added some coordinating doodling on the card base.  I also added some real English tea on the center of the mum flower.
Hope this card inspires you to create something yummy and to pour yourself a cuppa love.  Thanks for stopping by and I look forward to seeing more yummy creations throughout the rest of the hop!  See you next week!

Sunday, July 28, 2019

Sunday Sip...Tea Treats!


Hello there Coffee-tea-cocoa loving crafty friends!  It's Kerry here and I'm back with another fun Sunday Sip!  Today I'm sharing a fun little tea giftie for a special someone.  The gift includes a sweet little decorated gift bag with a little note tucked inside and a few hand-packaged bags of specialty teas.  The black polka-dot ribbon indicates a super delish English breakfast tea and the orange twine indicates a yummy vanilla Thai Tea. 

To create my ensemble, I started out by frothing some Nutpod "creamer" and brewing myself a cup of bold coffee.  After taking a few sips, I got to work on distressing a piece of Wendy Vecchi Perfect White cardstock by Ranger.  I then use the brand spankin' new Wendy Vecchi Make Art Blendable inks to create a vibrant background.  I used the new colors:  Forget Me Not, Tiger Lily and Leaf Green.  I also used the fabulous new blending brush "Big Beautiful Blending Brush" by The Cat's Pajamas to achieve the seamless blending.  After I was satisfied with the background color, I stamped the sentiment "A Million Thanks" from the Wendy Vecchi "Thanks a Million" stamp/die/stencil combo set a million times (hee hee) along the right edge of the panel. Next, I attached two strips of Wendy Vecchi washi tape along the other side of the panel.  I used my sewing machine to add some stitching on top of the washi for added texture.
Next, I set out to stamp and color the floral image in the set.  I wanted to use this ink as a watercolor medium so I dabbed a bit of each color onto my Ranger mat and used a superfine paint brush (and a bit of water) to add the color.  As I was coloring the image, I incorporated the Pink Peony and Carnation Red Blendable Dye inks as well to give some added dimension to the flower.  
When I felt the image was colored just the way I wanted it, I added a few white highlights here and there with my White Gelly Roll pen.  I added some graph paper (I just can't do without it!) and attached the flower.  To finish the panel off, I added some polka-dotted ribbon and a cute orange button.  I mounted this panel onto a black Jillibean Soup gift bag (retired) and started working on packaging the tea gifts.  While I was at it, I brewed myself up a cup of Thai tea in my French Press.  It made a mighty fine photo prop while it was steeping, right?
Thanks so much for hopping over today!  I have been having such a fabulous time crerating with the new Wendy Vecchi goodies and I want to thank Ranger for giving me the opportunity to play with these fabulous products!  The blendable inks...I'm in love (I had to order 'em ALL!) and the stamp/die/stencil combo is such a treat.  Of course, you've gotta love a nice collection of washi tape too!  WOO HOO!

Sunday, March 24, 2019

Sunday Sip...and a tower of coffee!

This week for my Sunday Sip post at Coffee Loving Cardmakers, I wanted to welcome Spring this week with a bright and cheery card!  

Just imagine the new grass growing, tons of daffodils and tulips popping up out of the ground and a stack of deelish coffee cups piling up in your sink.  LOL! 

My card today features a color scheme that's bright yellow and green and incorporates two new stamp sets from RG Avenue (RG Studio 360) called Happy Place and Scottish Napkin
To create this card, I started out by pulling out my Mysti so I could stamp the fun plaid background onto the limey green cardstock using RG Avenue Ink Rich Cactus. I then used an Opaque White Gelly Roll pen and a yellow colored pencil to add some brightness and highlights to the plaid pattern. After that, I started working on the cup stack. I stamped the cups in Black Taffy Ink and then colored with Copic Markers. I just love coloring with Copics.  It’s so relaxing!  I've shared the colors I used below, so make sure to scroll down and check 'em out.  
 After coloring the cup stack, I mounted the panels onto yellow cardstock and then started embellishing. I punched a circle to thread my lime green and sunshine yellow Hemptique Twine to and also threaded a mix of color coordinated buttons to adhere to my card. “Naked” buttons are not my thing, so of course, I had to tie a little twine through their holes.

What REALLY was my inspiration for this card?  Well, take a peek at my creamer container!  Recognize that color scheme?  Hee Hee.  My tasty Saturday morning coffee was a homemade Whole30 compliant (Yes, I’m at the tail-end of my Whole30 adventure)  iced coffee.  That's ANOTHER yum!  

Recipe:  I used Starbucks Dragon coffee, Nutpods Original creamer, vanilla bean and a sprinkling of toasted coconut.  Mighty tasty, I must say!  
Look at those mighty yummy looking coconut shavings.  SOOOO good!  

I toasted the coconut flakes so they would just melt in my mouth. They also provide a bit of sesame flavor if you ask me. Stir it around and it sinks to the bottom....and soaks up the coffee so you have a nice chewy treat when you're done! 


Thanks so much for stopping over.  I hope you have a fabulous Sunday and hope the rest of the week flies by for you!

Sunday, July 29, 2018

Sunday Sip...Refresh yourself!

Hello there Coffee Loving friends!  It's Sunday and that means I'm up on the Coffee Loving Cardmakers Blog with my weekly Sunday Sip and Share post.  I created this card and sketch yesterday while playing with my Gelli Plate.  I had so much fun playing with some new Liquid Colors I recently received in the mail.  

How did I create this card?  Well, I just squirted a bit of each color (Turbo Teal and Sweet Pear) onto my Gelli Plate and brayered the colors together.  I placed a piece of white cardstock over that and lifted it to print the paper.  I then took three different circle punches and punched some circles out. After that, I prepared a piece of white cardstock as my base card panel.  I splattered some Sweet Berry Liquid Color, Gold Silk and Sparkle Silk onto the white card panel and then dry brushed some light ivory acrylic paint over it to tone down the color.  Next, I brushed a bit of acrylic paint onto the punched circles.  I put a foam square onto each circle and assembled the circles onto the card panel in a pleasing layout.  Next, I flicked more Gold and Sparkle Silk onto the card panel.  
Next, I stamped the Sweet 'n Sassy Creative Worship "Fill Me Up" sentiment and the coffee cup using Memento Tuxedo Black ink and my Misti.  I colored the cup with a "Dot" pattern to mimic the design of the card.  After that, I fussy cut the cup and cut the sentiment and arranged them on the card.  Of course, few of my cards are without fibers or ribbon so I added a little bow using some Hemptique twine.  I added a few Nuvo Drops pearls here and there and then mounted the card onto the berry card base.

Like the card?  If so, please join the fun and create a card using the sketch below.  My sketches are always inspired by the cards I create so I hope you find them fun and challenging!  If you do happen to play along, please add a link to our inlinkz below.  I look forward to seeing your creation!


Sunday, July 22, 2018

Sunday Sip: Continuing the fun with FSJ Coffee Helps!

Hey there inky friends!  I'm back with another fun Sunday Sip feature on the Coffee Loving Cardmakers Blog and I am sharing a few more cards featuring the Coffee Helps stamp and die set from Fun Stampers Journey!  Did you happen to check out the FSJ/CLC collaboration blog hop on Friday?  If not, you'll definitely want to check out the hop!  It's FULL of amazing inspiration and will probably get you a bit thirsty!  LOL.  FSJ is offering a special prize for one lucky commenter (USA) and I'm offering a special FSJ prize pack too (NON-USA), so make sure to check it out and leave some love!

Now lets get on with today's Sip and Share post!  
My first card has a little funky Christmas theme!  I love non-traditional colors for Christmas Cards and I created this fun card that made me smile the whole time I was crafting.  As you can see, the sparkly washi peeking from behind the triangles makes for a good snowy look, right?  LOVE IT!  The little snowflake diecuts also helped to carry out the successful wintery theme!  WAHOO!  
Adding a bit of glaze on the heart helped make it shine and gave a little dimension to that heart.
To soften up the stenciled effect, I brushed water over the stenciled paint to let the paint bleed a bit.  It's a great way to soften those edges!  

FSJ Products used on this project:  


My second card also features the Ring Stacks stencil and the Coffee Helps Bundle.  I love the simple FUN of this card!  It's quite a departure from my usual multi layered cards but it allowed me to add a bit of multi-media effects that helped bring it past the simple CAS design.  

To create my blue panel, I painted the stencil onto the Beach Breeze cardstock and then brushed water over the stenciled design to allow the ink to bleed a little as well as to break down the fibers on the paper.  After drying the paper with my heat gun, the paper looked quite like some mulberry paper!  I really love the effect!  
Can you see how the paper is pilling up?  That wasn't an accident!  I wanted my paper to have a textured "mulberry-like" effect.  WAHOO!
Of course, adding some stitching (minus the thread) helped add another "layer" to my card.  That little Spanish sentiment from Text Happy stamp set was too perfect not to include on my card!

 FSJ products used on this project:  


If you're inspired by this creation, please join in and play along with this week's sketch challenge.  Just make sure to add your project to our inlinkz below and share your project on social media using the hashtag #clcsipandshare.  We'd love to see your creation!  


Sunday, May 27, 2018

Sunday Sip...Is Hoppin'!

Hello there Coffee Loving Cardmakers.  It's Kerry here and I'm sharing my newest creation for Sunday Sip and Share.  This card is especially for the Spring and Summer Coffee Lovers hop so I won't add too much information...as I know you have a lot of hopping to do!  LOL

 I created this card using products I purchased from one of our Super Sponsors for the hop and one of my favorite online retailers:  Butterfly Reflections, Ink.  Pinkfresh Studios stamps, Gina K Stamps, and Studio Katia dies...YUM! 
Take a peek at the sketch challenge that I created for this hop:  
Just create a fun card inspired by my card/sketch and I'll be watching for it!  

Hop Deets:  

When:  Friday, May 25-June 1
Theme:  Spring and Summer
Use:  Coffee/Tea/Cocoa images

Prizes Galore!
 SUPER GENEROUS SUPER SPONSORS 
Check out the lead blog post from Coffee Loving Cardmakers HERE
Direct link to the Hop post is here:  POST YOUR PROJECTS HERE 

Sunday, September 10, 2017

Sunday Sip...Fixer Upper!


Hello there coffee loving friends!  It's Kerry here and I'm back with another Sunday Sip and SHare post.  I'm sending HEALING and SAFETY vibes to all those affected by the hurricanes and unfriendly weather/earth events that have been happening.  While watching weather news and live "before the storm" painting events 24-7 this weekend, I realized it wasn't a surprise that my card creations would take a turn towards healing and...coffee...Lots of coffee!  Coffee is a comfort to my heart and bandages, well...they cover the wounds that are inevitably being created right now.  I just want to send good healing vibes and comfort.  

My card incorporates the use of a new coffee-loving sentiment set from Joy Clair called Coffee Quotes.  As a Super Sponsor for the Fall Coffee Lovers Hop, they've got some awesome clear coffee-loving stamps that will surely make their way into your coffee-tea-cocoa loving heart.  I know they have mine!  I'll be sharing a few more cards using this set during the hop so make sure to spy them...You just might win a special treat!
After stamping the sentiment onto white cardstock, I mounted it onto some orange cardstock for contrast then applied some old bandages (real ones) to a white panel.  I machine stitched a border to make it more fun!
After mounting the sentiment onto the bandage panel, I stamped and colored the coffee tumbler with watercolor pencils.  I cut the cup out and added a pop dot to attach it to the sentiment panel.  After that, I attached the bandage panel to some Kraft paper (just paper, not cardstock) and mounted the whole thing onto a white card base.  Easy, peasy and perfect for a friend in need!
Thanks for stopping by to check out my card.  I hope you have a glorious week.  If you're dealing with the aftermath of the storms, know that I continue to pray for you and am here for you...
Love the card?  I think you'll love the sketch too!  Why not give the card sketch a try?!  Play along with the CLCSipandShare sketch challenge and you just might be the monthly winner of a coffee-loving crafty prize!  Just add a link to your creation in the inlinkz below!


Sunday, September 25, 2016

Sunday Sip and Share...Hopping Along!


Hello there Coffee/Tea/Hot Chocolate loving friends!  It's me Kerry, back with another Sunday Sip and Share!  I'm sharing a little project I created last night for the Fall Hop.  I had a goal of making a card each day (for each one of my blogs) but I caught a nasty cold a week ago and it hasn't let up!  Stamping and Coffee are my liquid therapy, so I've been trying to create through my icky feels...It's working, but I missed a day yesterday.  I'm too tired and icky. Wahhh!!!  Anyway, I did create this tag card last night particularly for this post, and I'm really loving it!  Hope you do too!
I started off by selecting a fun fall image!  Waaay back in the day, I subscribed to the Unity Stamp of the Week Club and like many others, I amassed a huge collection of gorgeous itty bitty stamps.  I was bad, and just packed most of them away as I had trouble inking them up as fast as I received them...I'm happy I didn't let them go because they're becoming some yummy treasures in my stash!  This particular mini set is called "Nuts But I Love Ya" by Joslyn Nielson (WIB-399).  I see it is still available in the Unity Shop. 
I love the crosshatching in the image and decided to ink it up, color it with Ranger Distress Inks and use it on a card...Problem was, I had no "sketchy" cup to coordinate...so what to do???  I doodled one myself!  I colored it up and cut it out and it was a perfect match!
When watercoloring the acorn image, I used a mix of some older colors:  Walnut Stain, Peeled Paint, Rusty Hinge, Bundled Sage and Broken China.  I also used my FSJ Gold Silk as a paint medium and added just a hint to the edges of the acorns and the crosshatching on the coffee sleeve.  I hope the photo allows you to see some of the flecks and shimmer of gold.  After coloring, I added some Journey Glaze on the acorns and cup for gloss and shine.
When ordering from Unity Stamp Company, I often receive a freebie bag of goodies to craft with. Sometimes, as in this case, it is a few tags, a couple buttons, some yummy twine and a cute itty bitty stamp.  I used these freebies to make this tag!   I also added a bit of some My Minds Eye 6x6 All Spice printed paper.  It's an oldie but goodie from my collection.  I also added a bit of vellum to the layering.
After creating the tag, I assembled the card.  Just a little layering onto a white card base and voila!  I was happy with how it turned out!  Isn't it fun!?!
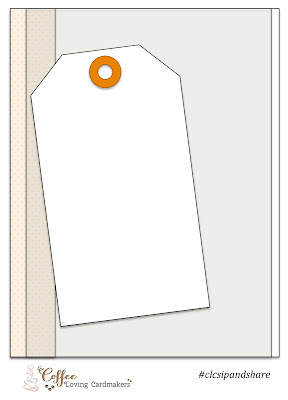
Next, I set out to build the sketch...Here it is...Simplified layering, of course. I hope you enjoy using this sketch and if you do, please share your creation with us!  We would LOVE to see what you make.  Make sure to come back and add your link to our September Sip and Share collection below!   If sharing to social media, please remember to include the hashtag #clcsipandshare for easy reference!
I hope you enjoyed today's post!  I'll see you around the blog hop! Back to creating some coffee loving cards and projects....and sipping Thera-flu...