Showing posts with label Digi stamps. Show all posts

Saturday, January 16, 2021

Sending Hedge Hugs!

Hello there inky friends!  Today I'm sharing a sweet little Hedgie card to help encourage rainbow vibes!  You know, happiness, peace and love?!  I just think we all need a little more of that lately!  And because it is Martin Luther King, Jr's birthday celebration this Monday, I hope my card finds you full of hope for the future!  As the memory of Dr. King's determined fight for fairness and equality through responsible and peaceful protests encourages me to continue to fight for what's right in this world and in our great USA, I hope memories of him encourage you too.  

Like bears, hedge hogs are some of my most favorite animals to create with.  I just love these adorable hedgies from 88 and Clear!  They give me a sense of calm and happiness and make me smile.  I decided to add a doodled pastel rainbow that mimics the playful and whimsical nature of these designs.  This digi stamp set "Hedge Hugs" is available as the fun January 5 for 5 card class January 18!!!  Pretty amazing that you can get this set for 5 bucks! And on top of that you get a fun card class that will inspire you to create even more cute projects with this set.  

Thanks for hopping over to check out my card.  I hope you join RG in creating adorable cards using this sweet set!  I hope it inspires you to create something fun!!!

Monday, February 10, 2020

Coffee Love....Happy Valentine's WEEK!


Hello there inky friends! Today I'm sharing a few cards I created using the fun brand new stamp sets from RG Avenue. Heart Day (digital only) and Awesome Thoughts (stamp and digi options) are perfect for this season of LOVE!  

To create my first card, I edited the images to my liking and then cut them out. I colored the images with Copic markers. I then brushed white acrylic paint onto a Gelli Plate and then dropped one drop of Sour Mist onto it then brushed it together to blend. I laid a piece of Powdered Sugar cardstock onto the plate and pressed the ink on. After that, I applied some sprinkles of RG Avenue Gold embossing powder onto the paint and then heat set it (from the underside) until it melted. Next I started assembling the collage.  

When designing the cup, I opted to remove the whimsical heart and apply the "Hugs and Kisses" sentiment and a sketchy heart from the "Hello Beautiful" sentiment in the Awesome Thoughts set. I love this sketchy heart and it works perfectly for this design. 
My second card was created in a similar manner however, I chose to use Rich Cherry and Sour Guava mixed with white acrylic ink (on my Gelli Plate). I then added RG Avenue Silver embossing powder in the same manner as before then added some flicks of black acrylic paint.  
Again, I chose to remove the whimsical heart and instead added the fun sketchy heart onto each to-go cup. After coloring and cutting out the printed images, I assembled them onto a piece of ribbon with foam squares. I also applied black twine to the background to add to the movement of this card.  

 I really love how both cards turned out and I can't wait to share them with someone special this year.  :)


Saturday, January 4, 2020

Love is In the Air: Graciellie Designs January 2020

Hello there inky friends.  Today I'm sharing a sweet little Lovie-dovie card I created with the new Graciellie Designs January 2020 release digi set called "Love is in the Air".  It's a beautiful set that contains some woodgrain elements and some frilly, curly sweet sentiments.  Check it out!  You can also purchase the complete January Digi bundle HERE.
To create my card, I started out by creating a background using an edited version of the I HEART YOU heart.  I shrunk the image and changed the color as well as turned it into a shadow image.  Then I layered this image repeatedly onto the page to create a heart paper background.  After that, I colored the same heart (resized) using Copic markers before fussy cutting it.  
Next, I machine stitched the background so that I could add a little more texture in the corners and then I brushed the edges with some Catherine Pooler Sand Castle ink.  The final step was distressing the edges with my fingernail and assembling the pretty spray collage.  I added some fun elements like a button from a friend, some feathers from my embellishment stash and a few flat back pearls.  So pretty.  I also added a little strip of sparkly gold cardstock from my scrap bin.  I mounted this panel onto a burgundy panel and a little bit of rosy cardstock to create a stacked layer.  then attached it to a Kraft card base.  FINISHED!
Pretty, pretty.  Now ready to send to someone special!  Thanks for hopping over to check out my card.  I hope you were inspired.  :)

Friday, July 19, 2019

Coffee Loving Cardmakers and Graciellie Design Collaboration Hop

Hello there Coffee/Tea/Cocoa loving crafty peeps! Today I'm joining my fellow Coffee Loving Cardmakers Designers and my fellow Graciellie Design Ambassadors as we share some tasty inspiration with you!  If you've arrived here from Erin's blog, you're on the right track!  


Leave comments along the way for a chance to win a $25 Graciellie Design Gift Code.  Commenting will be open until Friday, July 26th at 11:59 pm pacific.  A winner will be announced on the Coffee Loving Cardmaker’s blog the following week.  Winners will be picked from across all participating blogs, the more you comment, the more chances to win.

Please note:  Gracie is having a 25% off SALE as well!  Just make sure to hop over to her shop HERE to pick up your favorite sets at a sweet discount!  

I selected the new digi set "Tea for the Soul" to create a comforting and soothing spread in my little traveler's notebook.  I plan on adding a few photos that I take on vacation this summer (black and white).
I really love the yellow and green in this layout.  So fresh, so yum!  
For my second project, I created a little card and collection of sticky notes to give to a teacher friend on the beginning of the school year.  I designed the sticky notes in MS Word and then printed them out on my printer.  Next, I used one of the smaller sticky notes to add to the card that goes with the set.  
 "Brew Like a Boss" has so many thoughts for the brand new school year and I knew it was the perfect sentiment to remind my fellow coffee-loving teacher that it's time to get into our teacher groove.  I added the iced tea because sometimes the beginning of the school year can be a quite bit hectic and having coffee to get us revved up and ready for anything is a MUST!
Brew Like a Boss digi bundle
I colored the iced tea image with Copics and with a few watercolor pencils and then added a few highlights of white to get the lighting just right.
Of course, this color of hibiscus is my favorite so I grabbed some corals and started coloring.  i just wish I can get the real flowers to grow in my yard.  I'm not much of a green thumb, you know.
 Perfectly deelish, don'tcha think?!

Thanks for hopping over.  Please head on over to Annette's blog HERE for more inspiration!  If you're off the beaten path, you can find the complete blogroll below.

Saturday, March 16, 2019

Be Authentic...A fab new Graciellie Digi Bundle!

Hello there inky friends!  I'm back today with a few cards I created to add to my encouragement stash.  Graciellie's sentiments and images are always the perfect go-to for my encouragement cards!  Today I'm featuring the Graciellie Design digi set called Authentic.  It's a beautiful and inspirational set, don't you think?  Purchase any stamp bundle at 40% off!  Use Code NEWFORYOU at checkout to get your discount!  

Authentic Digital Stamp Set $5.99
 I created this card using MS Word.  I started out by laying down some florals in a cluster then lightened them up to create a watermarked image.  After that, I laid out the larger flower and inserted the leaves too.  These leaves were placed behind the larger flower.  After creating the design, I printed it and cut it out to fit an A2 card layout.
After cutting out the panel, I colored the images using Copic markers.  As I wanted to help keep the background florals very light and "watermark-like", I chose the lightest peach I could find in my Copic stash.   
To finish up the card, I glued a golden piece of cardstock along the right edge of the colored panel, attached some vibrant orange satin ribbon to the kraft card base and popped the stamped panel over that.  I added five flat-backed pearls to the card and called it DONE!  

I was able to create two additional cards using digital images I had included in my original MS Word document.  I love that I can create multiple cards using just one sheet of white cardstock!  For my second and third card, I created a leafy background by laying out the leaf cluster image onto my word document.  I then included one loose leaf and a smaller single floral image.  I also included two sentiments.  

To create the first leafy background card, I cut the leaf panel so that it would fit nicely on an A2 card base with a double mount of lavenders.  I then colored the images with Copic markers.  Next, I cut out the floral and the separate leaf cluster then attached that to my sentiment banner.  
As with most of my cards, I include ribbon, twine and other embellishments.  I just can't get enough of  ribbon!
 A closer look at the flower will give you a hint of the sparkly bits on my pretty flower!
 Leaves, leaves, leaves!  Love 'em!

For my third and final card, I incorporated the use of the remaining portion of my leafy background.  I tied in the sentiment and a fun diecut border frame.
 I added a bit of black splatter to tie in the black on the images.
 Of course, adding a pretty bow with the remaining ribbon was necessary.

...a reason to smile...That makes me think of YELLOW!  Sooo...I tied in the "smile with a yummy yellow button and a milky yellow card base.  HAPPY, HAPPY, HAPPY!

Thanks so much for hopping over to check out these cards.  Remember, you can get a steal of a deal on this (and other) digi sets by including the secret code upon checkout.  What are you waiting for?  Hop over to Gracie's shop and go shopping!

Friday, March 15, 2019

Goooood Morning! RG releases his newest bundle...

Hey there inky friends!  Today I'm so excited to share with you the newest Ahhh-mazing stamp/digi bundle that has been released at RG Studio 360 (aka RG Avenue).  If you know me well, you'll know that this set is giving me all the heart eyes and all the feels...I LOVE COFFEE!  
This first set of cards were created using digital images from the Good Morning set and the Scottish Napkin background.  I just LOVE the plaid and adjusted the image settings to print it in a deep burgundy color.  This coordinated well with the colors I wanted to use for my to-go cup.  
Good Morning Stamp/Digi bundle
After laying out the plaid on the bottom of a Sweet Cane card base, I used some ivory acrylic paint to mute down the colors and make the images pop.  I also flicked some Sugar Drops onto the panel to give it some zing.  Next, I cut out the to-go cup and colored it with a Copic Marker and then the sleeve with Sugar Drops.  
To finish off the card, I attached some dark brown satin ribbon, popped the cup onto the card with pop-dots and added a coordinating sentiment.
Next up, I wanted that cold drink cup to shine on my second card so I did some stitching onto a white card panel, colored the cold drink cup to mimic some of my favorite boba tea and attached a little twine and a pretty pink bow. 
 To allow me to create a boba-like filling in my cup, I used several Copic markers to make the dots.
Finishing off things was pretty easy as I used a panel of Sour Guava cardstock and mounted the whole thing onto a Powdered Sugar card base.

Copics Used:  E00, E21, E53, E 47,  E71, W-7, R59, RV42

Thanks for popping over today!  I'll be back again with another fun and festive card featuring this awesome bundle!  See you soon!

Sunday, February 10, 2019

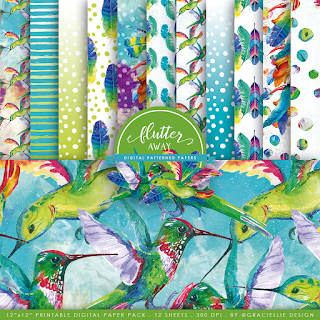
Flutter with Graciellie's newest designs "Flutter Away"...

 Hello there inky friends!  Today I'm thrilled to share a little card I created featuring the newest Digi stamps in Graciellie's online shop.  This collection of digi stamps and papers were so inspiring (as are all of her stamps) and I REALLY loved the color palette she has in her coordinating paper line!  I decided to use some of the colors in her paper palette when designing my card. 

To create this card, I just opened up a Microsoft Word file and started with a 4.00x5.25 rectangle.  I arranged the two feathers over this rectangle so that they would appear to be flying all over the page.  I also wanted a few of the feathers to escape the edge of the rectangle, so I made sure to purposefully place them breaking the boundary of the rectangle.  After I was satisfied with the layout, I created a smaller rectangle and placed the sentiment inside.  I printed and cut the rectangles out so that I could move on to coloring!
Flutter Away Digi Stamp Set ON SALE NOW!

WOW!!!  I just LOVE that the cost of these digital downloads are less expensive than ONE CARD purchased from a store.  That's pretty amazing!  
Flutter Away Digi Paper ON SALE NOW!
There were just a few Copic colors used on this card.  They included:  BG01, FBG2, YG13, Y04, C-3 and a bright red...I put it back before I remembered to take note of the number.  oops.  After coloring, I applied some clear microfine glitter and attached some sequins. 

To finish off the card, I mounted the colored panel onto a piece of neon lime green cardstock and then mounted the whole panel onto a coordinating teal card base. 
Before attaching the sentiment, I added some golden thread and mounted the sentiment over that.  

So fun!  I'm in love with the sentiments in this set and have another project in the works.  It'll be posted soon so make sure to come back again real soon.  Thanks so much for hopping over.  I hope you have a fabulous week!  

Saturday, January 26, 2019

Graciellie Designs... Love and Friends...

Hello there inky friends! I'm thrilled to announce that I've been asked to join the Graciellie Designs team!  I'm so honored to be able to create with such amazing digital art from Gracie's hands!  She is so talented and her designs never disappoint.  It is such an honor to design for her using her gorgeous and detailed digital designs!  

I decided to feature her Sweet Love paper collection in combination with her Love and Friends digital stamp set as my first official post.  I selected these two collections because of the connection I have to them and to my stamping family.  You know, it's pretty amazing to be connected to so many talented designers and crafters all around the world and it's such a privilidge to be one of these "friends".  It's amazing how we are so connected and close and in almost all instances, we have never met in person.  Someday, Someday!  

So this card goes out to all my crafty friends...Wherever and whoever you are...Sending love your way!  

I started out by copying and pasting the background paper from this collection into a Word Document.  Since the images are square, I reset the size proportions so they would fit 5.25x4 inches.  I adjusted the color by lightening it up to make it a soft and sweet background.  After that, I copied the heart wreath  and the sentiment (resized to my liking) and printed it all out on my home printer.  Once printed, I cut everything out.  I prepared my background paper onto a white card base and set it aside so I could color the wreath.  

The wreath was colored with several Copic Colors that matched perfectly with the paper collection:  

Browns: E23, E25, E71; Y28; YR14
Greens: G24; YG06, YG13, YG25, YG63 
Pinks: R20, R32; RV10
Grays: C1, C3

After coloring the wreath, I cut the sentiment and threaded it through the wreath then attached a few foam squares to pop the sentiment up onto the card base.  Next, I added some lovely burlap ribbon from my stash.  Finally, I added some blingy flat-back pearls and glittered up the florals with microfine glitter to give it some sparkle!  

Thanks so much for hopping over to check out my first Graciellie Design creation!  I'm so excited to be among such talented designers and I look forward to so many more opportunities to create with her beautiful designs!  

Love the products used in my creation?  Hop over to Gracie's shop and pick up your own collection.  They are the most fabulous and easy to use digis on the market today!  
Love and Friends

Sweet Love Digi Paper Collection