Showing posts with label Photos. Show all posts

Saturday, February 8, 2020

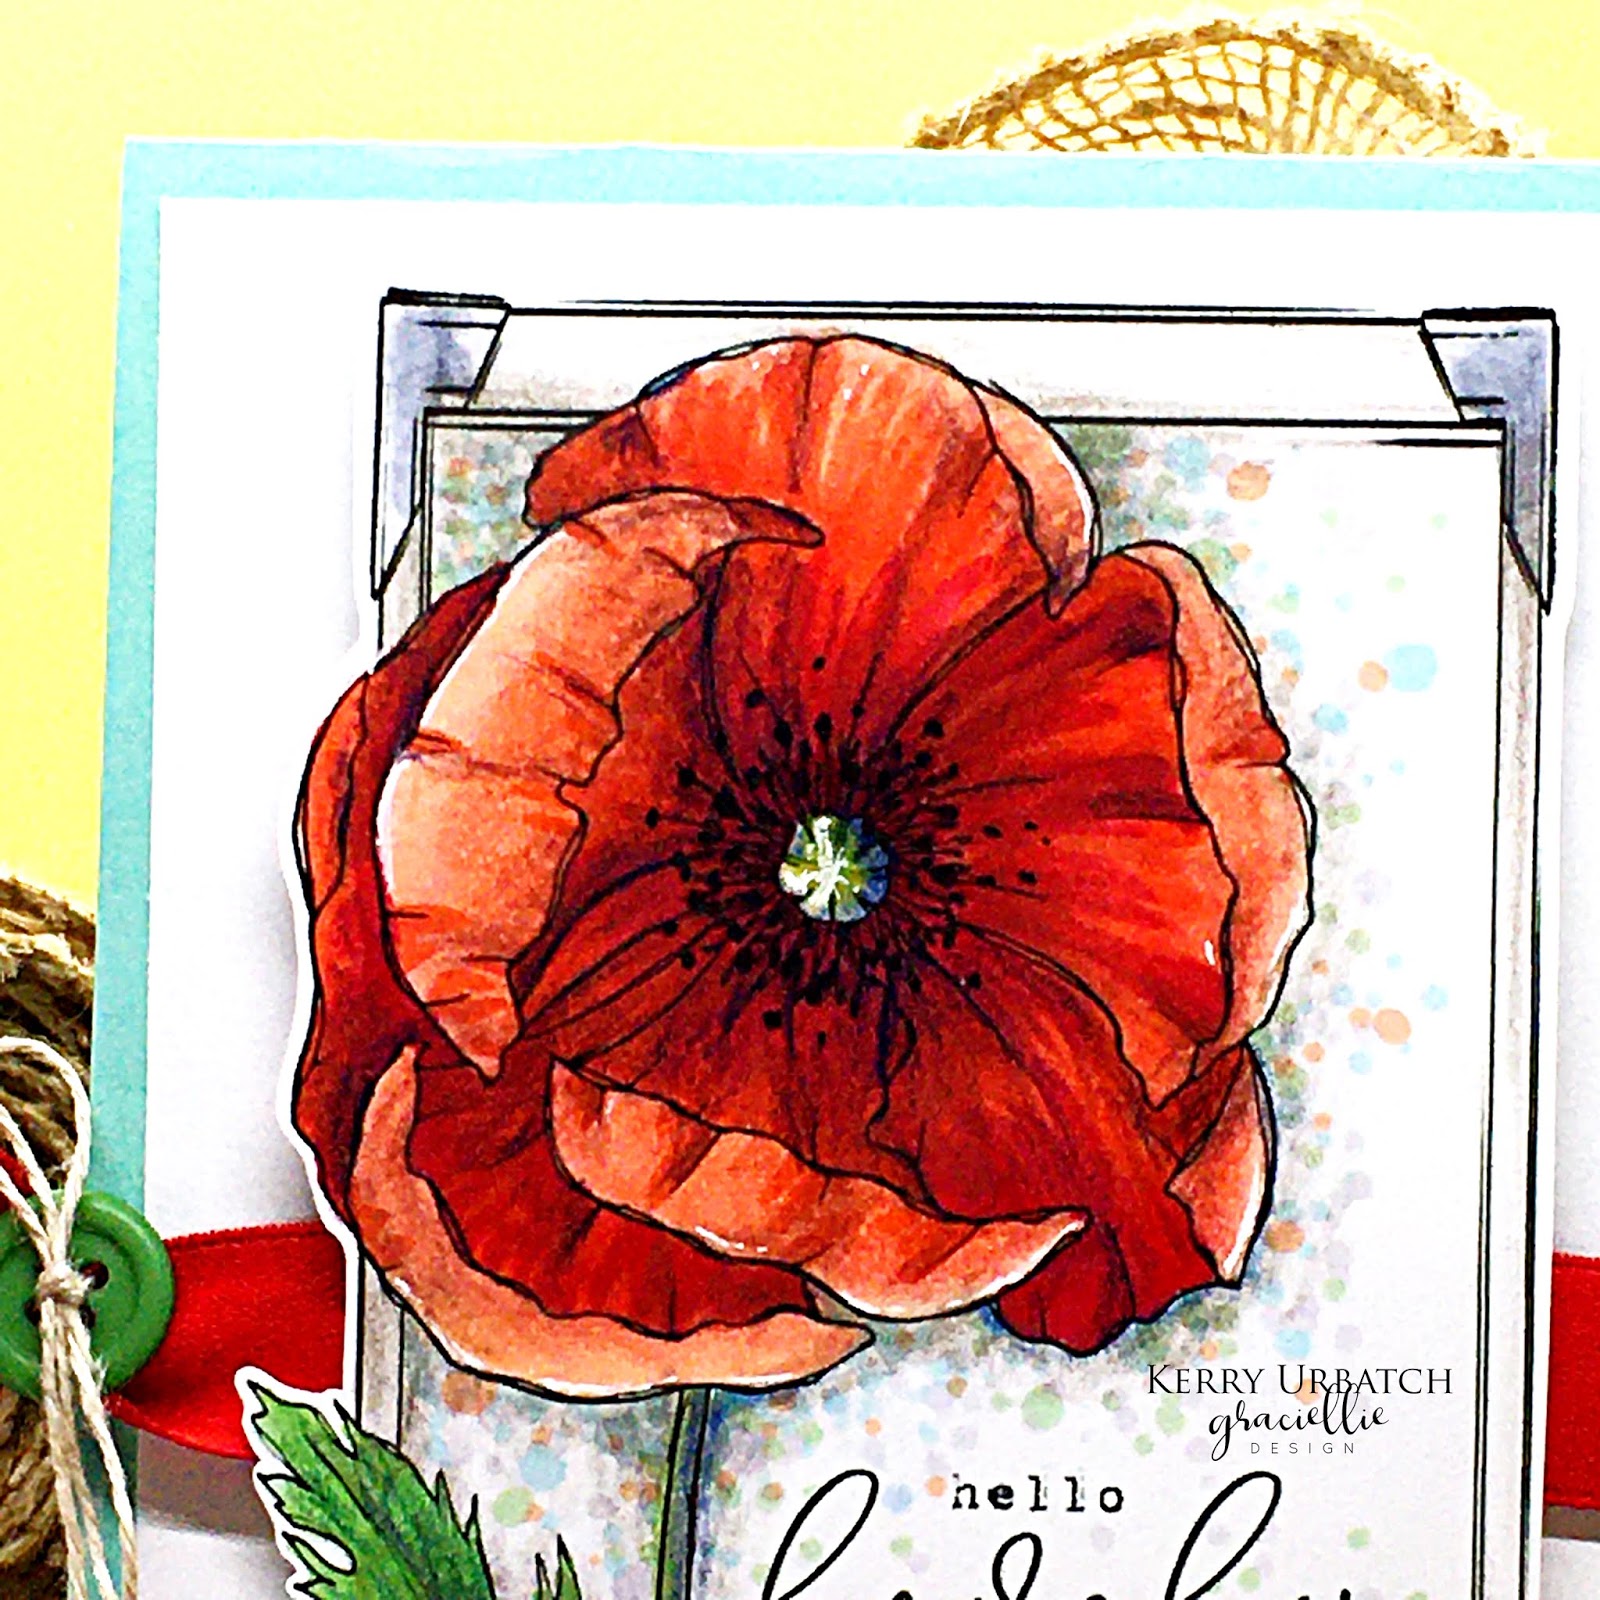
Gracie's Poppies...A Snapshot

Hello there inky friends!  Today I'm trying to spend the day catching up and getting crafty.  I've been a bit overwhelmed with school lately and have just wanted to come home and veggggg out.  This has left a big empty space in my crafty production and has made for a big old mess to remain on my crafty workspace.  I just don't feel like cleaning it up and it is just taking over...I hope this weekend I can get all "Clean Freaky" and get the job done.  UGHH...If not, it's going to take over.  LOL

Anyway, I worked on computer this week and fiddled around with a few brand spankin new digi sets from Graciellie Design and I printed some "good looks" for this weekend.  SOOOO.... I spent a few evenenings coloring this image and finally this morning, it was complete.  I don't usually color an image over several days, but I just couldn't get out of the funk this week.  I'm glad I took the time with it because I love how it turned out.  Had I not, it would have most likely been a disaster and would have ended up in the trash-ola!

So to create this card, I combined two images from two different sets that were released in January.  I love the themes and they combine so beautifully. 
Sweet Memories Mega Bundle

Beautiful Day
After overlaying the poppy (and the sentiment) onto the frame image, I printed it out and started coloring.  I used a combination of Copics, Colored pencils and Microfine pens to finish the image.  Since I don't pull or plan my color beforehand, I just grab as I go and finish when I feel it looks done.  This strategy inevitably ends up in about 30 markers used and several different darker colored pencils.  That's why I usually don't share the colors #'s I use...I don't really plan it and it would definitely be a longshot to duplicate. 


When I was working on the inside of the flower, I first started out by coloring it gray...and then I thought it probably wasn't gray but yellow...but I didn't want to research it on the internet.  Sooo...I just added some light yellow on it and then went to town on adding some fun black dots.  I've seen those black poppy seed like dots on those flowers...I thought.  HA HA.  That's how I roll. 
 After coloring the flower, I wanted to tie the flower into the background photo frame so I did a bit of stippling with Copics and then used colored pencils to add details, shadows and a little white pen for some highlights. 
After I was done coloring, I took on the chore of selecting the perfect background card base.  I pulled a lot of colors:  mustard, this foamy green, a more leafy green, a pink, a lavender and a peachy red.  Since I wanted to add a red ribbon to the piece, i selected this foamy green to be the backdrop.  It looked the best paired with the image and really pulled out the faint teal stipples in the image. 

So there you have it!  One project down this week, several more to go.  WOO WEE!

PS...  Hop over to Gracie's digi shop this weekend!  She's got a fabulous sale going on and you can pick up so many of her sets for a steal! 

Tuesday, July 16, 2013

more puppy mail...

Mailing off another group of cards to some of Mason's friends.  I'm glad I spent some time going through my photo album so I could order some pictures through snapfish.com.  Love that I have a collection of small instagrams that are photo quality that I can scrap and journal with.  They make cute little card elements too!!!  Doesn't hurt that the edits I did through picmonkey.com also add to the "cute" factor.
This card was created using some of my favorite Tim Holtz stamps, some yummy graph paper and clear embossing powder.  I love the combination of kraft cardstock with graph/notebook paper!  
For this card I used some Hero Arts greeting stamps on the background and a little more of the plaid paper that was left over from another Mason card.  I love the contrast of the red and green grass in the photo.  Makes Mason just POP!
 Look closely at the corners and around the paper and it glistens in the light...Just like Mason's hair!  Used Brilliance Moonlight White to distress around the page.  The card isn't complete without some ribbon (even though it may cost more to mail).

See you again for more stampy creations!

Wednesday, July 3, 2013

Puppy Mail...

Here's another card I made using a photo I took of my new puppy Mason:


I used the paw print stamp from a stamp set designed by Phyllis Harris originally distributed by The Angel Company and is now available through Unity.

Monday, May 31, 2010

Giving Thanks...

Photo taken at Quantico National Cemetery

What a beautiful weekend! I have taken time this weekend to give thanks to those who have sacrificed themselves for the sake of all Americans. I'm thankful to all those who have died fighting for the freedom we share and seek for our future. I am posting this card, with a little note attached to all those who unselfishly gave their lives. For that, I will forever be grateful.

Sorry, there were too many copics to keep track of (over thirty) in this card. The Tilda that was used was Tilda with Bee. I just used a new Studio G Mother's day ribbon set.

I selected the background image because it reminded me of the rolling hills I saw at Arlington Cemetery and at Quantico National Cemetery. I spent some time at Quantico this weekend taking pictures, listening to the flags flap in the breeze, listening to the birds singing and listening to the silence...yes, it does have an amazing sound. It was a place to reflect on my freedoms and all those who gave it to me.

The Ultimate Sacrifice, Quantico National Cemetery May, 2010
I was quite disappointed that only a few graves had a US flag posted. My personal challenge (and possibly for my school/students) for Memorial Day 2011 is to get a flag for EVERY tombstone and place it there by Memorial Day, 2011. If you would like to contribute, please inquire.

Saturday, December 19, 2009

Snow Fun Day!

Here are some snowy pictures. 18 inches and counting!

Not the best self portrait, but hope you get the point...I LOVE SNOW!!!

Peanut hates it! She is shivvverrrrinnnggg and wants to go back inside.

This is my snowman the first time I shoveled...

Here he is the second time:


NO JOKE, NO SNOW PILE...Just a spot that was untouched...Almost 18 inches...Can you believe it? WEEYOOOO!!!

Peanut hears a little birdie chirping!
Back later!
Bring on the BLIZZARD! So far, I've measured 14 inches and it's still coming down. I've shoveled a pee-pee path in the back yard for Peanut, scooped up the snow on the sidewalk and stairway, and made a path around the car. Of course, this is only the first time and won't be the last. That's OK, I'm ready for more!!!

While shoveling, I heard a little "woof, woof" ...

I turned around and saw that Peanut had fallen (or walked) off the top step to the house and landed in the snowfilled flowerbed...She was stuck in the snow and couldn't get out. She was standing along the side of the step waiting for me to rescue her. Awww...She just HATES snow, but she just HAS to come out and watch me shovel every time!

I'm headed upstairs to finish making more Christmas cards. Yes, I'm sure they'll really be late arrivals!