Showing posts with label Heartfelt Creations Alumni Hop. Show all posts

Friday, December 18, 2020

Heartfelt Creations Alumni Hop December 2020

Hello there crafty friends!  I'm joining my fellow Heartfelt Creations Alumni Designers as we hop and celebrate the end of the 2020 year with a fun hop!  If you've arrived here from Kathy's blog, you're on the right track.  If not, that's ok.  You can find the complete blogroll at the bottom of my post!  As with all of our monthly hops, one random comment from a mystery blog in this hop will win a $25 Heartfelt Creations Gift Card on Tuesday, December 22nd. If you win from my blog, I'll contact you and Heartfelt Creations will also announce the winner on their blog and Facebook page on Wednesday, December 23rd.
For this month's project, I pulled out my Gelli Plate, Rich Red and Ivory Acrylic Paint and used a sponge dauber to blend the ink in an ombre fashion. After that, I used my Christmas Poinsettia and Holly stamps to a design on the Gelli Plate impression. I then pressed some white cardstock onto the plate and lifted to reveal the master background. YUM! After that, I used VersaColor Nocturne ink to stamp the poinsettias over the Gelli Plate press background and then embossed with gold embossing powder.

Next, I added some green sparkle to the centers of these flowers and then moved on to the embellishing.  I added a tiny poinsettia that was colored with Copics, some holly and stamped the sentiment (from the Candy Cane Cottage set) onto a panel that was machine stitched.  To finish things off, attached some black twine and a red button before mounting the panel onto a white card base.  

Thanks so much for stopping by today!  I hope my project inspires you to create something gorgeous.  See you again next month and have a very Merry Christmas!  Please hop on to Vicki's blog to check out her beautiful creation!  

Blogroll:  

Friday, October 30, 2020

Heartfelt Creations October Alumni Hop...Inspiration Galore!


Hello there inky friends!  I'm moving way past Fall and making a mad dash to WINTER!  Is anyone with me?  WOO!  Fall and Winter are my most favorite seasons and I am already over raking leaves and wet leaves from the yucky rain, so let's move on to winter, shall we?!  


Today, I'm joining my fellow Heartfelt Creations DT Alumni as we share some fun inspiration and fun this month!  Every month, the Alumni DT members get together for a fun family gathering in blogland and share our love of stamping and creating with each other.  It's so amazing to be a part of this inky/creative family!  If you've arrived here from Candy's blog, you're on the right track.  If not, you'll find the complete blogroll at the bottom of my post to help you along your way.  

Remember,  one lucky commenter will be chosen from one of the blogs to be this month's prize winner so you'll want to leave some love at every hop spot in order to have a chance at the goodies!  We appreciate your comments and know that your visit will continue to inspire us to create with Heartfelt Creations products we all love! 

I created my wintery card using the adorable stamps Merry Moments (On sale now!) Cling set and the Candy Cane Cottage (On Sale Now!) Cling set.  I paired it up with the pretty Poinsettia & Holly Clusters Cling set/Dies and Shaping Mold to make a fun and festive shaker card.  
I started out by stamping the gingerbread house onto white cardstock and then colored it with Copics and watercolor pencils.  I fussy cut the colored image and then glued it to a light blue piece of cardstock (5 1/4 x 4).  I then took some ivory acrylic paint and washed a bit over the top of the paper to dull down the image and coloring.  I added  a colored polar bear/panda image with a foam square then some foam around the image panel before filling the area with microfine glitter, styrofoam "snowballs" and some Blue Suede Shoes Prills and Minnie Pearls Prills and mounted a laminated panel to the top and tested out the shaker with a shake, shake, shake!  Perfect!

Next, I cut a piece of light blue cardstock and freeform cut the inside to create a fun frame.  I rubbed the edges of the panel with my finger to fuss it up a bit and then stamped the holly leaves with embossing ink then used some white embossing powder to make the holly leaves show up and make the blue panel blend well with the scene.  After that, I mounted it over the laminated sheet and attached the whole shaker to the front of an A2 card base (topfold).  To finish things off, I diecut some poinsettias, pressed them in the mold and assembled them.  I added some glitter to make them shine then mounted them on the card.  I added some acrylic flats to the center of each flower and my card was complete.  Can't wait to send this card to someone special!

Thanks for hopping over to my blog to check out my card.  I hope it inspires you to create something amazing and please stop by again.  Make sure to hop over to Amarilys' blog to see her inspiring creation!  See you next month and good luck!  

This month's BLOGROLL:
Kerry (ME!)

Friday, September 25, 2020

Heartfelt Creations Alumni Hop September: Inspiration Galore!


Hello there inky friends!  It's that time of month again...ermmmm...not THAT kind, but it is the fun Heartfelt Creations Alumni DT Inspiration Blog Hop!  WOOP!!!  This month, we've got a ton of talented designers sharing some gorgeous inspiration using Heartfelt Creations products!   Make sure to take a stroll to each hop spot for some inspiration and for tips/ideas!  We hope you enjoy this hop and wish you good luck in this month's drawing!  If you arrived here from Vicki's blog, you're on the right track!  If not, you can find the full blogroll at the bottom of my post today.  Happy Hopping!!!


This month my focus is on FALL.  I LOVE the fall season and the changes that it brings.  I love the cooler weather, the fall colors, the longer walks with my pooch and the holidays coming soon.  My focus for this card was the beautiful colors in the fall.  I just love the rich oranges and reds in the leaves so I used these colors in my design.  

I used one of my favorite flower collections for this card too.  I just love the pretty "country" vibe the Oakberry Lane collection gives me.  I used the Oakberry Lane Blossoms Cling stamps and colored them with a mix of Copics and watercolor pencils.  After diecutting them with the coordinating dies HERE, I pressed them using the mold HERE.  I am soooo addicted to these molds!  They make the flowers soooo professional!  After creating my flowers, I assembled them in layers and added some Prills (THESE) to the centers.  i set them aside to dry and then started working on the background.  

I decided to take the leaf die and use it as a stencil on my background.  I love that it allows me to give a little bit of color and design without overwhelming the page.  Just a little brush with the blending brush was all that was needed on each corner.  After finishing the background paper, I used some foam squares to mount it to a piece of dark green cardstock and then burnished and curled the edges with my fingernails.  I tied some jute around this panel before assembling the "spray" onto the card.

When complete, I added more foam squares and attached this panel to an A2 rusty orange card base and my card was complete.  Since I will be sending this card with some special treats for fall, I didn't use a sentiment on the front...I'll save that for the inside with my handwritten note!  

Thanks so much for hopping over to check out my card.  I hope you continue to find inspiration in the posts following mine!  Happy Hopping and GOOD LUCK!

Hop Blogroll:  

Friday, June 26, 2020

Heartfelt Creations Alumni Hop...Pretty Posies


Hello there inky friends!  Today I'm joining my fellow Heartfelt Creations Alumni DT peeps as we share projects and inspiration for June.  It's been a while since I created with some new goodies and I'm so excited to be playing with new stamps, molds and embellies from HC!  If you've arrived here from Vicki's blog, you're on the hop trail, if not, you can find the complete hop list at the bottom of my post.

***A randomly chosen comment from a mystery blog will receive a $25 gift certificate to shop at Heartfelt Creations. To claim your prize please email Heartfelt Creations at socialmedia@heartfeltcreations.us with "Winner of the JUNE Alumni Hop" in the subject line.***
I decided to play with some pretty floral images and some gorgeous dies.  I started out by stamping the Oakberry Lane floral stamp set and then coloring with Copic markers.  After that, I diecut the images using the Oakberry Lane Blossoms Die set.  Next, I placed the diecuts in the 3-D Blossoms Shaping mold and ran them through my machine.  I layered the images with Dries Clear glue then applied some "Lettuce Entertain You Prills" to the centers of each flower.  I set the flowers aside and worked on the backer layer.
I diecut the gorgeous Eyelet Oval Die using a yummy plum cardstock and then mounted the pierced panel onto the border panel using Double Dots Foam Circles.  I then attached some Mini Pearls Prills to the center of the pierced elements to create some added fun.

After arranging the flowers onto the frame, I attached everything with Double Dots Foam Circles and then attached a pink twine bow with a wooden button.  I mounted this panel onto a rich green card base and then trimmed the top filigree from the frame to allow the card to open and close efficiently.  This card measures 4.25x5 1/2 inches.  SO FUN!
Now, I was a bit undecided on the card base color for this card so I thought I'd share the other option that I think I like better...A bit more Summer-Sunshine with this option, I think.  What do you think?


Thanks for hopping over to check out my card.  I hope it inspires you and makes you want to get your crafty goodies out and play!  Please hop over to check out Magda's beautiful creation this month!

Kathy 
Rosa 
Vicki 
Magda
Lisa
Amarilys 
Carole 
Candy
Sarah
Oksana

Tuesday, December 29, 2015

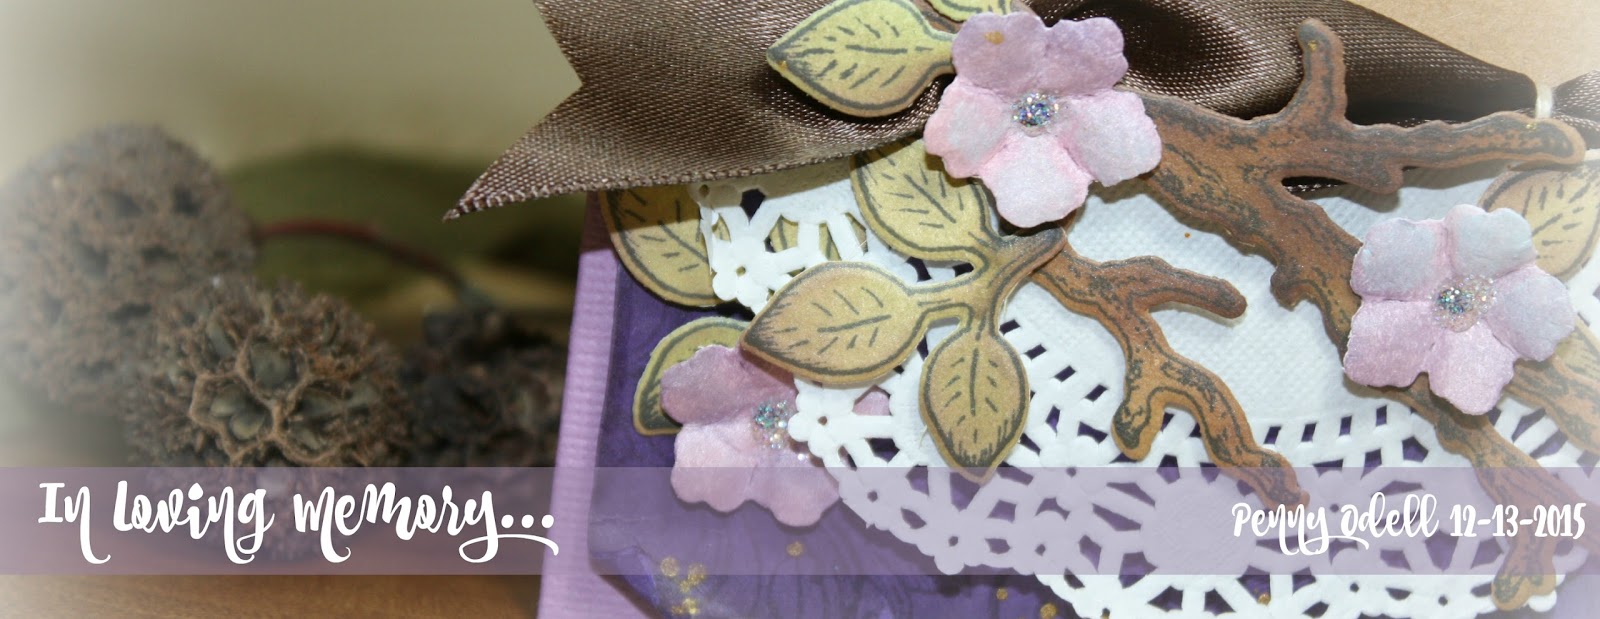
Remembering Penny Odell...

Hello there stamping friends,

I'm joining my fellow Heartfelt Creations Design Team members in our Monthly Blog Hop and this month, it's a difficult one...We're blogging and hopping in memory of a fellow HC designer and friend...

Penny passed away December 13 and we're so saddened by her sudden passing.  She was a treasured member of the Heartfelt Creations Design Team and although I we didn't design on the same team/term, our Hearfelt DT family is touched deeply.

I'm sending prayers and blessings to Penny's family and closest friends as they mourn her loss.  

In planning my card specifically for Penny, I spent some time "visiting" with her through her beautiful creations on her blog...Her spirit spoke to me as I viewed her beautiful creations and noticed some of her favorite things...Although I never met her in person, I know that our love of stamping, cardmaking and inspiring others will continue to inspire and resonate to so many...
I selected some pink flowers...Yes, she loved working with Heartfelt Creations flowers, just as much as I do.  Purple...I don't often work in purple...but deep, rich plums are some favorites...I discovered this was also one of Penny's favorite colors.
Layers...Yes, like Penny, I share a love for lots of beautiful layers...
The sentiment/scripture spoke to me...No fear....She's HOME...  RIP Penny, you will be missed, your memory, treasured.  

Heartfelt Creations Products used:
Background Image: Retired
Leaves: Leafy Branch Cling Stamp Set
Scripture:  Uplifting Scriptures Cling Stamp Set
Leaf and Branch Die:  Leafy Branch Die Set
Crystal Lacquer
Crystal Ultrafine Glitter
Double Dots Foam Dots
Memento Tuxedo Black
Other:  
VersaMagic Dew Drops:  Red Brick, Hint of Pesto, Tea Leaves, Eggplant, Purple Hydrangea, Sea Breeze
Bazzill Cardstock (from Stash)
Embellishments:  Doily, Chocolate Satin Ribbon, Natural Twine, Gold Silk (splatter)


This month's hop starts 8am EST on Tues. December 29th and closes Fri. January 1st at midnight.
The blog hop winner will be announced here on my blog on Sat. January 2nd around NOON EST. 
** This winner will receive a $25 gift certificate to shop at Heartfelt Creations -simply email Emma Lou @EmmaLou@heartfeltcreations.us with "Winner of December Alumni Hop" in subject line.  Make sure you reply within 72 hours to claim their prize otherwise another name will be drawn. 

Thanks for hopping with us this month!  Please head over to Sarah Miller's blog for more inspiration and remembrance.    

Tuesday, August 25, 2015

August HC Alumni Hop, Hop, Hop!

THE WINNER OF THIS MONTH'S ALUMNI BLOG HOP IS:  NURSE YOUNG.  YOU HAVE 72 HOURS TO CLAIM YOUR PRIZE!  Please email Emma Lou with the heading:  "August Blog HOP winner" in the heading.  CONGRATULATIONS!

Hello there stamping friends,

I'm here today to join some of the Heartfelt Creations Design Team Alumni participate in the annual HOP.  I'm excited today because I have some of the NEWEST stamps and papers...I fell in love with the Farmer's Market Collection the first moment I laid eyes on it so I hurried over to the shop to purchase some of my most favorite pieces to add to my HC collection.

I'm not sure whether it was memories of my Grandma and her delicious pies, or my adventures in Amish country (Iowa and Pennsylvania), or the amazing weekend farmer's market in town, or me being a teacher (Apples, Apples everywhere).  This collection just wrapped itself around my heart. FOR REAL!

SO today I'm sharing my first set of projects created with this yummy collection.  I really enjoyed coloring the apples and the paper is just TOO delish!  I took a TON of photos so you could see all the yummy details and because I love this project sooo much!  I'm KEEPING it.  ;)  I hope you enjoy!

PS.  I also did a lengthy Periscope that shows how I colored the apples. Please follow me @KerbearCreations.

I wanted to use up the precious painted scraps from the acrylic painted design on the box so I incorporated that on the inside bottom flap of the card.
I added a peek-a-boo window of acetate on the bottom of the card so the stamped/colored apple design would show through.
Look at these yummy apples!  SO juicy, so sweet.  Do you think they are Gala or how about Braeburn?  hmmmm...
A little gift card holder using the YUMMY blue printed paper and some FSJ ribbons.  
I glued the painted/stamped panel to the front and back of this bamboo box then added some glass votive holders.  I filled them with school related supplies so I can put it on my teacher workspace!
Below you can see the texture of the acrylic paints underneath the stamped/colored apples.  I used my Gelli plate to apply the painted background onto white cardstock.
I didn't forget about the sides of the box!  I added some of the green patterned paper from this collection.  I LOVE the papers so much!  They are so rich and delicious!
Here's the back of the box.  You can see that the Gelli printed design does not extend to the end of the page.  I think this adds to the artistic and rustic feel...Love it.
 Another delicious shot.  MMMMMM
Next week I head back to the classroom....and I'll have something juicy and delicious to display!  :)
Phew...I hope you enjoyed all these photos and my commentary.  Have fun with the rest of the hop!  :)

Heartfelt Creations Items Used:  
Farmer's Market Paper Collection
Apple Harvest Cling Stamp Set
Clear Box (for card)
Clear Cardstock
Fun Stampers Journey Items Used:
Cocoa Powder True Fusion Ink Pad
Blending Solution and Re-inkers
Leaves:  Sweet Pear, Kiwi Slice, Green Olive, Beach Breeze
Apples:  Banana Cream, Rich Coral, Cranberry Bliss, Bubble Gum, Cocoa Powder
Gift Card Sleeve Die
Cocoa Powder Gingham ribbon
Candy Apple Satin Ribbon
Whip Cream Cardstock
Foam Squares (Small)
Journey Craft Glue

Other Items Used:  
Yellow Ochre Acrylic Paint
Antique White Acrylic Paint
10/0 Paintbrush
Bubble Wrap
Gelli Plate
Twine (Joanne's)
Bamboo Box
BLOG HOP DETAILS:  

So here is what you're working for:

...winner receives $25 gift certificate to shop at Heartfelt Creations -
You just need to email HC's Creative Director, Emma Lou with "Winner of August Alumni Hop" in
subject line.
This Month's Blogroll:  

The winner will be announced on August 29, so stop back to see if you've won!  The winner of the blog hop will have 72 hours to claim the prize so don't delay.  If the winner does not claim the prize in time, another name will be drawn.

Thanks for hopping along with us this month.  If you're following the hop crumb trail, you should head on over to VICKI'S blog.  I know she has something amazing to share with you!

***We appreciate your visits and LOVE your sweet comments.  Good luck in the drawing! Please stop by again.  I promise it won't be as long a post!  LOL

Tuesday, February 24, 2015

Blessings...

Hello Stamping Friends,

I'm happy to join the Heartfelt Creations Alumni Design Team in sharing our creations this month. I created a shadowbox that will be mailed to someone special.  I don't usually care for the color purple but for some reason I really gravitate to the plum hues in the spectrum.  To me, they are warm, romantic and truly heartfelt.  So whenever you see a purple card created by me, it will most likely contain this color combination.

The hop begins today at 8:00 EST and will end on Saturday, Feb. 28.  I will return after that to announce the winner.

As you journey on the hop, please take a moment to comment on each of our posts.  We appreciate your visit so much and love to read what you have to say about our projects.

**One lucky commenter will receive a $25.00 Gift Certificate to the Heartfelt Creations store.  You will have only 72 hours from the time your name is announced to claim your prize.

Now on to my project!

I selected the Twining Clematis Cling Set, the Malabar Clematis Cling Set and Uplifting Scriptures Cling Set for my project this month.
To create additional dimension on the piece, I stamped various flowers onto white cardstock then colored them with Copic markers.  Then I used my Paper Blossoms Tool Kit to gently dimensionalize the flowers.  I added Diamond Stickles and Crystal Lacquer on the flowers. When that dried, I added dots of yellow and green acrylic paint to the centers of the flowers.
Placing the stamped panel into the shadowbox was the final step.  The stamped panel measured 5 1/2 x 5 1/2- a perfect fit for the inside of the shadow box.  I chose not to paint or add color to the box as I thought the woodgrain really accentuated the flowers.  
The color was inspired by the Clematis plant that grew in my father's garden this year.  Here's a photo so you can see how beautiful his baby was:
I hope you enjoyed my project this month.  Please head over to Glenda's blog next.  If you're lost, you can follow the list of blog hop participants below:
Kerry Urbatch- That's ME!

Saturday, January 31, 2015

Winner, Winner!!!

Hello stampers!

I'm here to announce the winner of the Heartfelt Creations Alumni Blog Hop.  Congratulations goes to:
She was the lucky hopper that was selected from all the comments posted on our ADT blogs.  Thank you so much for taking the time to leave some love on my blog and for joining us on our hop.

Thanks also go to all the other hoppers who took time out of their day(s) to view, read, and/or comment on our blogs.  We so much appreciate your LOVE and I know it helps spread the word and love of the Heartfelt Creations brand... Created from the heart!

Patricia, you now have a 72 hour mission to contact Emma Lou (emmalou@heartfeltcreations.us) at Heartfelt Creations to claim your prize!

...winner receives $25 gift certificate to shop at Heartfelt Creations -
they just need to email Emma Lou with "Winner of January Alumni Hop" in
subject line.


Tuesday, January 27, 2015

Hop, Hop...

Hello stamping friends.  I'm joining the Heartfelt Creations Alumni team this month as we share cards and projects created with fabulous Heartfelt Creations products.  I'm excited about the new releases coming out after CHA!

***Our hop begins today and will end Friday, January 30 at noon EST.  One lucky commenter will win 25.00 Gift Certificate to the Heartfelt Creations store BUT to be in the drawing, please make sure to leave some love on each post in the hop.  When the winner is announced on Saturday, January 31, He/She will have just 72 hours to claim the prize.  So come back here (or to any other blog in the hop) to see if you are the big winner and to find out what to do (other than the backflips you are already doing).***

I'm sharing two cards with you this month...I just couldn't get enough!  LOL

My first project is a card I made with some scraps from a Gelli printing escapade I had a few weeks ago.  I love that I can slather yummy acrylic paint all over it and stamp with my stamps, stencil, doodle with a stick, and sprinkle glitter all over it, slap a piece of cardstock or fabric onto the plate and then peel it off to create the most beautiful backgrounds!!!
I applied gold, taupe and brown acrylic paint to my Gelli plate with my Speedball Brayer.  I used the sentiment and the fern (both HC Retired) onto the wet paint on the Gelli plate before printing.  This lifted some of the paint and left a slight stenciled effect.  I then stamped and cut the flower from another scrap of painted paper.  I added some black lines with my black Copic fineliner and a little bit of Gold Stickles.  After the background was dry, I stamped with HC Ferns and the sentiment again. Spritzing the paper with some Gold Glimmer Mist helped give more dimension to the background.

I was able to cut four cardfronts using this printed paper.  Scoring some KRAFT cardstock with my Scor-Pal gave me the perfect gallery wall for my cardfront!  I think what makes this card most beautiful is the crocheted lace and ribbon- as well as the little Posy Patch flower that I diecut and popped up with some golden cording.  Perfect little card to send to someone special, just because.

Here's a closer peek at the posy.   I would have used some of my Golden Tailings Elements, but I ran out and need to shop for more!
Here's a closer look at the spritzed sparkle:
Yummy, delicious goodness, 'eh?!

My second card was created using some Clear Cardstock, Hanko Designs Tsumugi Pink Cardstock, and some Frosted Plastic Cardstock from my stash (for the flower). I think the brad is a MME, but I'm not sure.
I cut the clear cardstock into an A2 sized card and created a topfold crease using my Scor-Pal.  Then I diecut all of the dies in the Posy Patch die collection onto Frosted Plastic Cardstock. After cutting the flowers with my Grand Calibur, I stamped all but the big one with the flower in the Posy Patch Garden Delights set. Then I colored the back side of a few of the flowers using Copic R29 and R22. After that, I cut the pink cardstock using the Spellbinders Grand Labels 4.  I stamped this cardstock with the sentiment from Hope in the Lord set, then embossed it with clear EP.
To finish it off, I added some black ribbon and set the panel onto the clear card base with the brad. To cover the brad on the inside of the card, I glued an additional diecut Nestie to cover it up as well as to secure the ribbon on the inside of the "sandwich".  
I hope you enjoyed my creations and the hop thus far.  Please make sure to stop over to Glenda's blog for more Heartfelt inspiration!  

Here are the January 2015 hop participants just so you don't get lost.  ;)

Emilia van den Heuvel
Lisa Gregory
Kerry Urbatch- That's ME!

Tuesday, August 26, 2014

Hop, Hop, Hop...

Surprise!  Yes, I'm alive...and well.  I can't believe it's been so long posting to my blog.  I've been busy with other things, I guess.  I've enjoyed a new venture into cookie decorating and have also jumped back into quilting.  As many of my friends know, I can't seem to do all things at once- and tend to focus completely on one "project" or adventure at a time.  Anyway, I decided to head into my stamping room to give it some much needed love- and start working on some cards for friends, family and...my students.  Then, it came to me!  The VISION...

Thanks for stopping by!  Please join me and my fellow Heartfelt Creations DT Alumni for this monthly hop.  We hope you enjoy our creations and find they inspire you to get stamping and creating! Please make sure to make a comment on each blog post so you can qualify for the gift certificate drawing.  The winner will be announced on Saturday-after the hop closes on Friday, August 29, midnight EST.  Good Luck!

Now on to my project!

I decided to combine my love of stamping and my love of fiber arts in creating my project this month.  It's been a time consuming project as it is being freehand quilted and hand beaded.  It's not completely done either because I can't seem to make up my mind how I want to finish it.  I'm thinking either a framed piece OR a little pillow...We'll see.  So today, I'm going to show you my process of working on this piece.  It was totally unplanned and just came from a vision...That's how I prefer to work.

For the first step, I selected some white cotton fabric (prewashed) and cut it approximately 12x12. I then pulled out my most favorite posies stamps.  LOVE THEM!  I inked up the stamps using India Ink and began to color the images with Memento inks and a wet paint brush.
Spraying some Glimmer Mist on the fabric helped to create a more vintage look as well as added some shine.  Drying only took a minute or two in front of the fan.

After painting the flowers, I added a bit of blue to create some shading as well as give the fabric more depth and texture.

After that, I added some Stickles because I LOVE sparkle.  Quite interestingly enough, the Stickles added two effects, sparkle, and in some areas- it acted as a bleach and lifted the Glimmer Mist color to create a marble-like effect.
Next it was on to the first stage of embellishing...adding seed beads and sequins.  A LOT of them. Yes, a tedious and time consuming process, but well worth it in the end.
Next, I was on to hand stitching designs with some colored thread and DMC floss.  I also added seed beads and sequins here and there.  After that, I added some batting to the back of the fabric, sewed one edge of the block to the batting (to decrease the likelihood of puckering fabric when stitching) and began the long process of hand quilting the square with some iridescent/silvery variegated thread.
Lotsa beads, lotsa stitches...My eyes are crossed and my fingers ar feeling stiff!  HA HA
I decided that I also needed to stitch the sentiment since I already had stitched the flowers so I used the same black thread.
Swirls and loops help keep this piece organic and freeform...so there was no need to worry about stitching crooked lines!  Love that!
So there you have it!  The process thus far.  I believe it'll take at least another day to complete the quilting and then I hope to have decided how to finish it off.  Please stop back in a few days to see the finished piece!

HC items Used:  
HCPC 3303 Posy Patch Flowers
HCD 701 Posy Patch Dies
HCPC 3377 Sympathy Sentiment PreCut Set 

Other items used:
White cotton fabric
Memento Ink:  Bahama Blue, Danube Blue, Ladybug Red, Grape Jelly, Rhubarb Stalk
India Ink: Black (Stewart Superior)
Dreamsicle Glimmer Mist (Tattered Angels)
Black, Orange thread
Metallic iridescent variegated thread
DMC floss (Pink, blue)

Embellished with:
Crystal Stickles
Iridescent sequins
Iridescent and black seed beads

Here's the blog order:  


I will be back around noon on Sat. August 30th to announce the winner of this hop.  The winner will receive a $25 gift certificate to shop at Heartfelt Creations -Good luck to all!!!