Showing posts with label RED. Show all posts

Monday, December 4, 2017

Poinsettia Deeelight!

Hello there Joy Clair friends!  It's Kerry here and I'm back with another festive Christmas Card.  This time I'm featuring the gorgeous new layering set called Christmas Poinsettia.  Did you have a chance to pick it up during the Black Friday sale?  If not, it's ok.  I think there are a few more sets available.  It's such an awesome set!  
To create this card I started off by creating a little color wash.  I rubbed some red ink from Memento onto my Gelli Plate and spritzed some gold and water on it too.  I used my finger to rub it together then plopped the paper right on top.  After that, I dried it with my heat gun.  
Next, I stamped the poinsettia on the paper with some red and burgundy ink (Memento) then added some golden embossed ones over that.  I used my Misti to stamp the sentiment perfectly onto the paper.   
I stamped the extra poinsettia onto the extra inked paper and embossed with gold embossing powder then cut them out so that I could layer them.  It was a quick assembly and then I was able to attach some ribbon to accentuate the design.  I added some bling to the layered poinsettia and added it over the knot on the bow...adding some golden thread too.  
To finish the card off, I stamped some poinsettia images onto the plain card panel then rubbed a bit of gold Pan Pastel over that so that it would show up all pretty and shiny.  Rubbed over that with a tissue to remove any excess pastel and mounted the Christmas panel to this using foam squares.  Such a pretty and elegant outcome!  

Wednesday, February 1, 2017

Plan on it! Joy Clair February Challenge: Shades of Red

Hello there stampers!  Today I'm joining many of my fellow Joy Clair Design Team (and hopefully YOU) in kicking off February's Joy Clair Monthly Challenge.  I decided to go double duty and prep one of my planners with this FIERY FEBRUARY divider page of LUUUUVVVE.  Hee hee hee.  

During 2017, Joy Clair will offer a monthly challenge that we hope will inspire your creative muse and help you get inky!  

As with any challenge, there are a few rules.  Please read our rules and follow them to be considered in the monthly drawing for a winner.  

RULES:
Create a project using a Joy Clair stamp (set) and use the inspiration image for the challenge.  You can use any of the stamps in the Joy Clair Collection HERE.  What?  You don't have any Joy Clair stamp sets yet?  We'll what are you waiting for?  SHOP AWAY!  Shipping is super fast and you'll get your order in no time at all!  

What can I create?  ANy type of project is accepted.  Make sure to include at least one Joy Clair stamp in your design.  Make sure to identify it in your description too!  

Where do I share my creation?  Post your project on either your personal blog, Instagram, Flickr, Pinterest, Facebook (set to public) or any online gallery.  You MUST link your posting back to the Joy Clair blog challenge post.  **Add a direct link to your project using the Inlinkz at the bottom of this post.  

Can I use older projects that I love?  While we love to see your favorite old picks, it's important that you share a brand-spankin' new project.  Please don't backlink an old project to our challenges.  Start FRESH!  


How many projects can I share with Joy Clair visitors?  You can share an unlimited amount of projects as long as they are NEW and relate to our challenge theme.   

This month, we're going all out with RED!  Take a peek at our inspiration photo snagged from design-seeds.com.  

Aren't the colors just sweet?  I love them.  I took these colors to heart when I created my fiery scene using the yummy set called IGNITE!  It's a perfect set for planners, cards, scrapbooks and bible journals, don't you think?  
Initially, I wanted to create a fiery card using the "Set a Fire" sentiment.  I gathered some cream acrylic paint and added a bit of reinkers to mix some custom fiery colors.  After that, I spritzed some water in the pan to thin the paint out.  Brushing the paint on was next, it was a pretty fast process.  
After the paint was dry, I stamped some of the flames using black Versafine ink.  I embossed (messy style) using some black embossing powder.  As you can see, Messy style is just that and ends up all over-even in my paint pan!  Not to worry, it makes the paint have a yummy texture and I love it!  :)
Next, I cut out a piece of Graph paper and started stamping and coloring it to my liking.  I also added my personalized "February" scripty writing along the edge.  The "Set A Fire" panel was cut out, dipped and sprinkled with gold and clear embossing powder and assembled onto the graph paper panel.
Here's a little zoomed-in peek at the flames added to the bottom of the fire.  I love how the messy embossing turned out!  Yes, the flames were fussy cut...I do love fussy cutting!  Adding some washi tape (Target last year) and mounting the panel onto some red (hole punched) cardstock finished it off.
Now I'm ready for what February has to throw at me!
Oh wait!!!  It's not to be forgotten!  I created a little planner clip using one of the flame images.  Isn't it cute???  It's nice and glossy-shiny as I used clear embossing powder and a little gold EP extra-thick on top!  It's the perfect little finishing touch that makes my February READY TO GO!  

Thanks for popping over to see my fun creation.  I hope you find some time this month to join us in this challenge.  Remember, all you have to do is create something yummy with a RED theme and Joy Clair image then stop over to the Joy Clair blog post HERE.  You can add your link below or add it directly right on the JC Blog.  We can't wait to see what you've got!

Thursday, June 16, 2011

Wedding Wish...

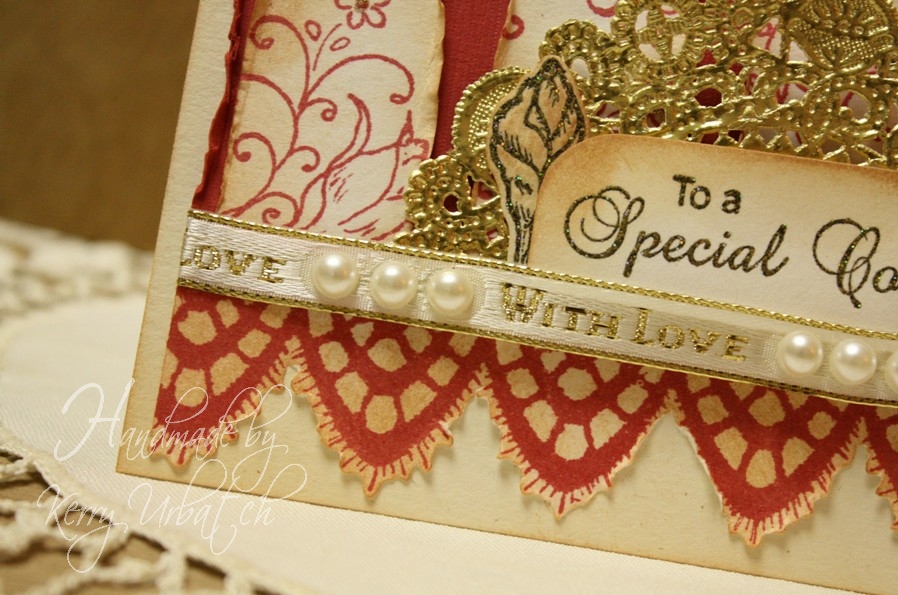
Well, We're right in the middle of Wedding season!  When I received the Bella Rose collection in the mail a few weeks ago, I began having visions of how to use it.  I hardly ever use stamping ink of any color other than my BLACK ink but for some reason, All I kept thinking of when I saw this lace and the roses was RED and GOLD...So I worked hard to duplicate my vision...The distressed edges on the image strips was an after thought when I was done because I felt it needed a little shabby contrast to go with the overly formal look.  Anyone that knows me knows that I AM NOT A FORMAL GAL...so I had to wrinkle things up a bit!!! 

Here are the details about this week's card: 
"To a Special Couple"

HCPC 3400 Bella Rosebud Precut Set
HCPC 3403 Shabby Chic Lace Precut Set
HCPC 3394 Classic Bella Rose Precut Set
Colorbox Chalk Ink: Warm Red
Ranger Distress Ink: Tea Dye
Recollections Pearls
Offray wired ribbon
Martha Stewart Extra Fine Gold Glitter
Dries White Glue
Ranger Inkssentials Pop Dots
Bazzill Red
The Paper Company Cream Fleck card base
Gold doily
Stampendous Gold Iridescent embossing powder
Directions:

Stamp Bella Rosebud repeatedly onto white cardstock. Cut into one inch strips then distress with tea dye ink. Add gold glitter to centers of small flowers. Assemble strips onto red cardstock layer that is 3x5 inches. Stamp Shabby Lace with red ink onto white cardstock. Cut out and distress with tea dye ink. Attach lace to red stamped panel. Attach ribbon and gold doily. Stamp sentiment and roses onto white cardstock with Versafine Onyx. Emboss with gold EP. Cut sentiment and flowers as shown and corner round sentiment. Distress with Vintage Photo ink. Attach sentiment with pop dots, attach flowers with glue and add adhesive backed pearls onto ribbon. Apply this panel to a white card base measuring 4 1/4 x 5 1/4 inches.

Finished size: 4 1/4 x 5 1/4 inches.

Please make sure to hop over to the Heartfelt Creations Blog to check out the other fabulous cards and projects my fellow design team sisters have created this week and be sure to stop in next week...We have a special treat for you!