Showing posts with label Heartfelt Creations. Show all posts

Friday, October 30, 2020

Heartfelt Creations October Alumni Hop...Inspiration Galore!


Hello there inky friends!  I'm moving way past Fall and making a mad dash to WINTER!  Is anyone with me?  WOO!  Fall and Winter are my most favorite seasons and I am already over raking leaves and wet leaves from the yucky rain, so let's move on to winter, shall we?!  


Today, I'm joining my fellow Heartfelt Creations DT Alumni as we share some fun inspiration and fun this month!  Every month, the Alumni DT members get together for a fun family gathering in blogland and share our love of stamping and creating with each other.  It's so amazing to be a part of this inky/creative family!  If you've arrived here from Candy's blog, you're on the right track.  If not, you'll find the complete blogroll at the bottom of my post to help you along your way.  

Remember,  one lucky commenter will be chosen from one of the blogs to be this month's prize winner so you'll want to leave some love at every hop spot in order to have a chance at the goodies!  We appreciate your comments and know that your visit will continue to inspire us to create with Heartfelt Creations products we all love! 

I created my wintery card using the adorable stamps Merry Moments (On sale now!) Cling set and the Candy Cane Cottage (On Sale Now!) Cling set.  I paired it up with the pretty Poinsettia & Holly Clusters Cling set/Dies and Shaping Mold to make a fun and festive shaker card.  
I started out by stamping the gingerbread house onto white cardstock and then colored it with Copics and watercolor pencils.  I fussy cut the colored image and then glued it to a light blue piece of cardstock (5 1/4 x 4).  I then took some ivory acrylic paint and washed a bit over the top of the paper to dull down the image and coloring.  I added  a colored polar bear/panda image with a foam square then some foam around the image panel before filling the area with microfine glitter, styrofoam "snowballs" and some Blue Suede Shoes Prills and Minnie Pearls Prills and mounted a laminated panel to the top and tested out the shaker with a shake, shake, shake!  Perfect!

Next, I cut a piece of light blue cardstock and freeform cut the inside to create a fun frame.  I rubbed the edges of the panel with my finger to fuss it up a bit and then stamped the holly leaves with embossing ink then used some white embossing powder to make the holly leaves show up and make the blue panel blend well with the scene.  After that, I mounted it over the laminated sheet and attached the whole shaker to the front of an A2 card base (topfold).  To finish things off, I diecut some poinsettias, pressed them in the mold and assembled them.  I added some glitter to make them shine then mounted them on the card.  I added some acrylic flats to the center of each flower and my card was complete.  Can't wait to send this card to someone special!

Thanks for hopping over to my blog to check out my card.  I hope it inspires you to create something amazing and please stop by again.  Make sure to hop over to Amarilys' blog to see her inspiring creation!  See you next month and good luck!  

This month's BLOGROLL:
Kerry (ME!)

Friday, June 26, 2020

Heartfelt Creations Alumni Hop...Pretty Posies


Hello there inky friends!  Today I'm joining my fellow Heartfelt Creations Alumni DT peeps as we share projects and inspiration for June.  It's been a while since I created with some new goodies and I'm so excited to be playing with new stamps, molds and embellies from HC!  If you've arrived here from Vicki's blog, you're on the hop trail, if not, you can find the complete hop list at the bottom of my post.

***A randomly chosen comment from a mystery blog will receive a $25 gift certificate to shop at Heartfelt Creations. To claim your prize please email Heartfelt Creations at socialmedia@heartfeltcreations.us with "Winner of the JUNE Alumni Hop" in the subject line.***
I decided to play with some pretty floral images and some gorgeous dies.  I started out by stamping the Oakberry Lane floral stamp set and then coloring with Copic markers.  After that, I diecut the images using the Oakberry Lane Blossoms Die set.  Next, I placed the diecuts in the 3-D Blossoms Shaping mold and ran them through my machine.  I layered the images with Dries Clear glue then applied some "Lettuce Entertain You Prills" to the centers of each flower.  I set the flowers aside and worked on the backer layer.
I diecut the gorgeous Eyelet Oval Die using a yummy plum cardstock and then mounted the pierced panel onto the border panel using Double Dots Foam Circles.  I then attached some Mini Pearls Prills to the center of the pierced elements to create some added fun.

After arranging the flowers onto the frame, I attached everything with Double Dots Foam Circles and then attached a pink twine bow with a wooden button.  I mounted this panel onto a rich green card base and then trimmed the top filigree from the frame to allow the card to open and close efficiently.  This card measures 4.25x5 1/2 inches.  SO FUN!
Now, I was a bit undecided on the card base color for this card so I thought I'd share the other option that I think I like better...A bit more Summer-Sunshine with this option, I think.  What do you think?


Thanks for hopping over to check out my card.  I hope it inspires you and makes you want to get your crafty goodies out and play!  Please hop over to check out Magda's beautiful creation this month!

Kathy 
Rosa 
Vicki 
Magda
Lisa
Amarilys 
Carole 
Candy
Sarah
Oksana

Tuesday, December 29, 2015

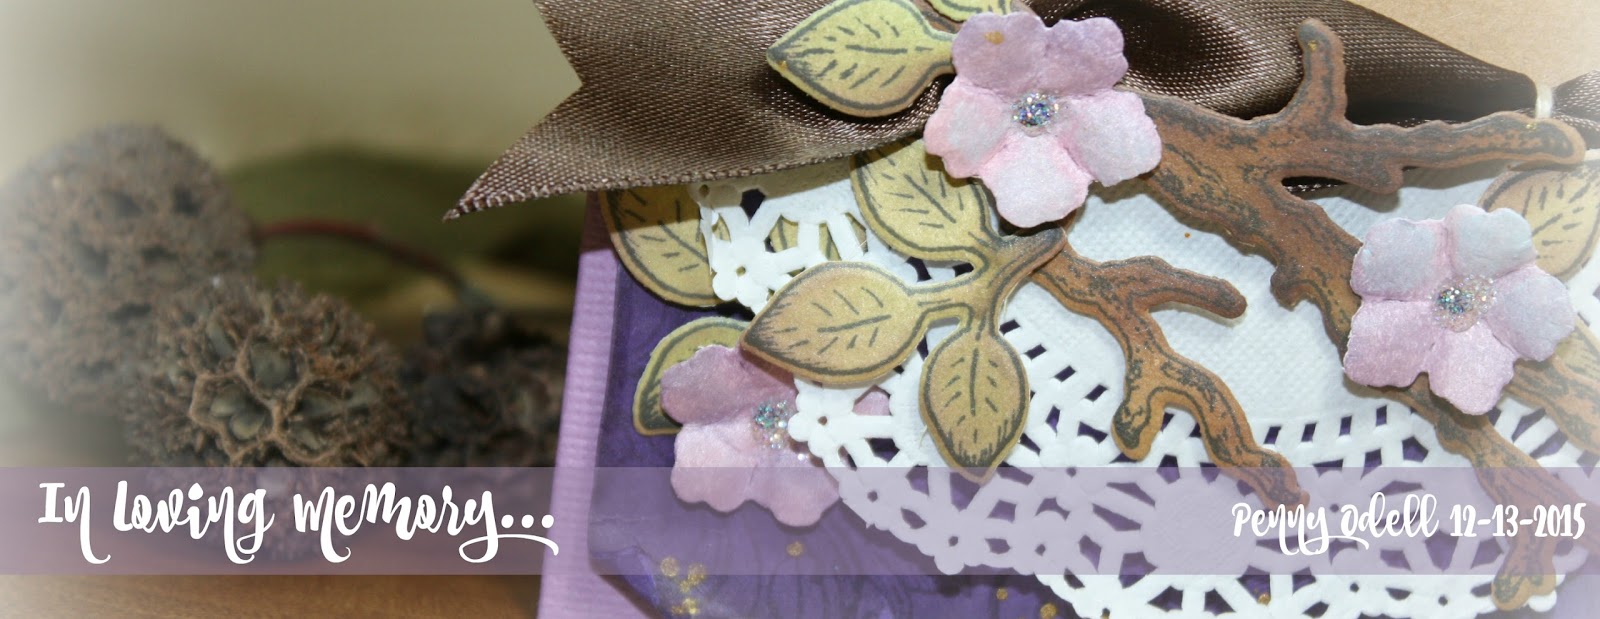
Remembering Penny Odell...

Hello there stamping friends,

I'm joining my fellow Heartfelt Creations Design Team members in our Monthly Blog Hop and this month, it's a difficult one...We're blogging and hopping in memory of a fellow HC designer and friend...

Penny passed away December 13 and we're so saddened by her sudden passing.  She was a treasured member of the Heartfelt Creations Design Team and although I we didn't design on the same team/term, our Hearfelt DT family is touched deeply.

I'm sending prayers and blessings to Penny's family and closest friends as they mourn her loss.  

In planning my card specifically for Penny, I spent some time "visiting" with her through her beautiful creations on her blog...Her spirit spoke to me as I viewed her beautiful creations and noticed some of her favorite things...Although I never met her in person, I know that our love of stamping, cardmaking and inspiring others will continue to inspire and resonate to so many...
I selected some pink flowers...Yes, she loved working with Heartfelt Creations flowers, just as much as I do.  Purple...I don't often work in purple...but deep, rich plums are some favorites...I discovered this was also one of Penny's favorite colors.
Layers...Yes, like Penny, I share a love for lots of beautiful layers...
The sentiment/scripture spoke to me...No fear....She's HOME...  RIP Penny, you will be missed, your memory, treasured.  

Heartfelt Creations Products used:
Background Image: Retired
Leaves: Leafy Branch Cling Stamp Set
Scripture:  Uplifting Scriptures Cling Stamp Set
Leaf and Branch Die:  Leafy Branch Die Set
Crystal Lacquer
Crystal Ultrafine Glitter
Double Dots Foam Dots
Memento Tuxedo Black
Other:  
VersaMagic Dew Drops:  Red Brick, Hint of Pesto, Tea Leaves, Eggplant, Purple Hydrangea, Sea Breeze
Bazzill Cardstock (from Stash)
Embellishments:  Doily, Chocolate Satin Ribbon, Natural Twine, Gold Silk (splatter)


This month's hop starts 8am EST on Tues. December 29th and closes Fri. January 1st at midnight.
The blog hop winner will be announced here on my blog on Sat. January 2nd around NOON EST. 
** This winner will receive a $25 gift certificate to shop at Heartfelt Creations -simply email Emma Lou @EmmaLou@heartfeltcreations.us with "Winner of December Alumni Hop" in subject line.  Make sure you reply within 72 hours to claim their prize otherwise another name will be drawn. 

Thanks for hopping with us this month!  Please head over to Sarah Miller's blog for more inspiration and remembrance.    

Saturday, March 7, 2015

The Heavens Proclaim...

This week, I received some sad news from a fellow teacher.  Her daughter passed away after a 5 year battle with metastatic Breast Cancer.  She leaves behind a husband, two young daughters, a mother and father, loving family and so many friends.  Cancer took away the future she was to have with her loving family and friends.  I hate Cancer for that.
Dear Laura,

      I pray for your family.  I pray the memories you created will comfort them for evermore.  I pray your family finds comfort in the many people that were impacted by your generous spirit and fight for life.  I pray for your husband.  I pray he sees you in the sunlight in his window each morning, a butterfly on a flower, a star twinkling at night...  I pray your girls feel your breath in their hair, your touch on their shoulder, and your pep in their steps. I pray for your mother Margaret, I pray that she will emerge from her darkest of days and know you left a beautiful legacy and will forever be remembered.

Please say a prayer for this family.   Rest Peacefully Laura Elizabeth (Harbour) Scott.
Framed and ready for delivery!

Tuesday, July 24, 2012

Happy Anniversary!

 Hello Stamping Friends!

Today I'm sharing a card I made for my aunt and uncle who are celebrating their 60th wedding anniversary soon.  Actually, I made this for my mom to mail to them.

Huhhh??? I went to the local BJ's (like Costco or Sam's Club) with my mom and dad and little niece this past weekend and spied my mom checking out the card section.  I was shocked and said "What are you doing over there?" "Oh, I'm just looking for a card for your aunt and uncle's anniversary." she said.    "Well, don't buy one!  I can just make one for you!!!"  You would think she would do this on a day I'm NOT with her!!!  i mean really!  She KNOWS I make cards and could whip one up and bring it right over!  Sheesh!!!  So, I went home and made this card and brought it over to her the next day.
I went to my stamping room with a few things in mind...I wanted to use some pretty paper and an off center diecut.  So I set out to work and this is what I made...Pretty little flower from Heartfelt Creations stamps, sentiment from an old TAC set (I just saw that it is NOW AVAILABLE through RED RUBBER DESIGNS!!!) and some yummy, yummy paper!!!
The patterned paper selected for this card is from _.  It's been in my paper stack for quite a LONG time!!!  I just love the old fashioned look.  I even added a little bit on the inside of the card.  

Supplies Used:  
Stamps:  Heartfelt Creations:  Posy Patch Flowers, Red Rubber Designs:  Trendy Greetings
Memento Tuxedo Black ink
Ranger Vintage Photo Ink
Cuttlebug Embossing Folder
Sewing Thread
Patterned Paper:  Sassafrass Sunshine Broadcast wee bundle
White Cardstock
Copic Markers
Ribbon
Flat Back Pearl

Saturday, June 30, 2012

Winner, Winner...

Hello Stamping Friends!

I'm excited to announce the winning comment for the Heartfelt Creations June 2012 Alumni Blog Hop!!!

All those who commented in the hop had their name placed in the drawing for a free $25.00 gift certificate to the Heartfelt Creations store.  The winner came from RIGHT HERE on MY BLOG..WOO HOO!!!  Congratulations goes to....
Dorina- Please contact me via email by clicking on my username as you do not have your information available.  It will include further information to help you claim your prize.

Thanks to everyone who played along, see ya soon!!!

Tuesday, June 26, 2012

Heartfelt Creations Alumni Hop...


Hey stamping friends!

Now that I'm on summer vacation and don't have any Design Team commitments, I decided to participate in my first ever ALUMNI Hop!  Yes, Heartfelt Creations Alumni designers have a hop every month and YES, there is a PRIZE!!!  Want to win a $25.00 Gift Certificate to the Heartfelt Creations store?  To have your chance, just comment along the hop and you might WIN!  The winner will be announced on the hop blogs on June 30.
It all started with the patterned paper!  Yep, I pulled out my 6x6 pack of My Mind's Eye "Breeze" Patterned paper and got to work.  I liked the sentiment displayed on the polka-dotted paper so I wanted to create something to work around that.  It's basically a collage of layers that I arranged on the table until I was happy.  Then from there, I decided to overstamp the patterned paper strip with some white ink and embossing powder using the Heartfelt Creations (HCPC 3462 My Guy Precut Set).  Sewing that strip onto the paper layers was next.  I wanted to include the horse (HCPC 3456 Western Bronco Precut set) somewhere on the card and moved it all over the layout until I was finally happy with it's position on the far left.  My cards are never missing ribbon, so this time I used some manly ribbon that is tied off and stapled...I really like how this card turned out!  Not sure if I'll keep it or put it up on my Etsy shop...We'll see...
Please join in on the hop by visiting my other DT Alum sisters.  I'm sure you'll find their creations inspiring!!! Have fun and thanks for stoppin' by!!!
Kerry (That's ME!)
Linda

Thursday, June 21, 2012

In Sympathy...

Hey stamping friends!

Today I'm showcasing some of the ever elusive individual stamps at Heartfelt Creations. THEY ARE AWESOME TOO!!!...Did you know that Heartfelt Creations has a MASSIVE collection of nicely priced individual stamps on wood, plain rubber, or with EZMount?  I really LOVE this option as they come in a wide variety of styles and can be used for many purposes.  
  
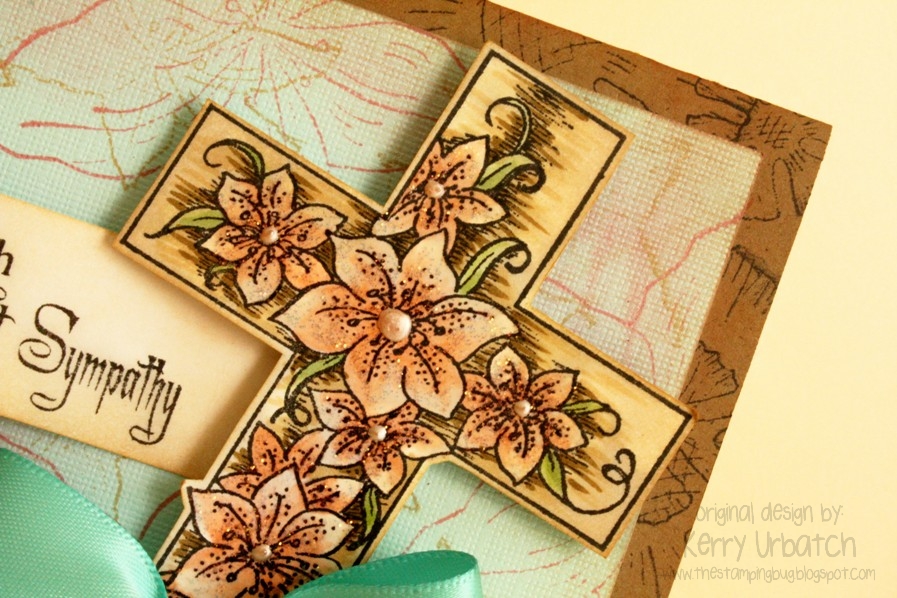
I created a sympathy card for my college roomie who lost her grandfather recently.  I know how hard it is to lose an amazing grandpa, so I needed something extra special to send.   I really love the Pear/Plum/Cream combination lately, so that's the color scheme I went with.   I used two individual stamps that I can't seem to locate on the Heartfelt Creations website.  Perhaps they are now discontinued (waahhhh!) or can be included in upcoming Precut Sets...(HINT HINT!):  Small Background Shades (7585ez) and  Small Fern (3940ez) .  I also used the sentiment from the HCPC 3377 Sympathy Sentiments and the Spellbinders Parisian Accents Dies.  Other items used were Cream cardstock from the Paper Company, My Minds Eye 6x6 pad A Beautiful Life, Memento Pear Tart, Sweet Plum and Desert Sand Dew Drops, Gold Liquid Pearls, Stardust Stickles, Pear Tart Fireworks! spritz to give the background some sparkle and of course, plum ribbon...mmmmmmmm... 
Come back soon!!!

Tuesday, June 19, 2012

In Honor of Lisa Lynne...

Hello stamping friends!

Today is a day some have set aside to honor a dear stamping sister.

I was shocked to learn a few days ago that one of my fellow Heartfelt Creations Design Team Alumni sisters passed away suddenly.  It was a total shock.  I remembered reading her blog and seeing her beautiful HC card posted the day before.  I spent time this week just trying to make sense of it all and trying hard to believe that it was actually for real.  As a fellow stamper, I'm sure you know the heartache when you learn of the loss of a fellow stamping friend.  It's quite difficult to share the significance of a loss of a friend you have never met in person.  The people in my "real world" often have no idea how people I've met online through a shared passion of stamping and praise have made an impression on me and have helped make me the person I am today.

I never had the opportunity to meet Lisa Lynne in person, but I was enamoured by her cheerful spirit and her smile when we shared comments and posts on Splitcoast.  Check out her gallery on Splitcoast here:  llwright.   After meeting her on Splitcoast, I discovered that I was so lucky to have been able to call her a DT sister on the Heartfelt Creations design team.  Lisa Lynne's style always envoked sunshine, happiness and...a ribbon of love to tie it all together, it seemed.  I felt a personal connection with her designs and they felt almost like I had been right there beside her creating and chatting...I sure wish I had the chance to get to meet her in person.

Please hop along with her stamping family as we honor her contributions to the world of stamping, the friendships that were made, her loving spirit, and her cheerful smile.  I pray she is at peace and is watching over those she loved the most.  Good Bye, friend...


Tribute HOP:


Wednesday, April 18, 2012

Heartfelt Wednesdays...

 Hello Stamping Friends!

It's Wednesday and that means I'm sharing another fun creation using Heartfelt Creations stamps and dies!  Here's a pretty little card that pulls in one of my favorite flower images...I just love how the flower matches the paper!  You know, I seem to have a thing for attaching my stamped images on top of the ribbon knots...I'm not sure why, but they end up there as a "cherry on top" thing, I guess.

 See--- Yummy color combo and the pretty curly cues created by the wired ribbon!
I used the neat Heartfelt Creations exclusive diecut (the rope) from the new Rustic Western Elements Die Set

Here's the nitty gritty on this card:


Thinking about you...

HCD 721 Rustic Western Elements Die (rope)
HCPC 3383 Cardinal Posy PreCut Set (sentiment) Limited Edition!!!
HCPC 3375 Flora Grande 1 PreCut Set
Blossoms 3 Nestabilities
Grand Calibur
Zip Dry Glue

Other:
Embossing Folder "Starry Night" by Sizzix/Basic Grey
Bazzill Cardstock: Harvest
Natural Paper Company Cardstock Card Base (A2)
Hanko Designs Japanese Paper: Rose Tsumugi
My Minds Eye 6x6 patterned Paper "A Happy Heart"
Copics:  R95; Y02; YR31; YR61
Memento Tuxedo Black
Versafine Onyx
Bling
Plum Satin ribbon
Silver wire cording

Directions:  Assemble layered panel:  Rose, embossed Harvest.  Cut smaller panel:  Harvest, patterned paper.  Attach Patterned panel layer to base layer, then attach ribbon.  Create tag from Rose paper then attach stamped sentiment.  Use rope diecut to create border design for reverse of patterned paper and edge of tag.  Attach  rose colored "rope" cut out to patterned paper and apply bling.  Attach to tag just above diecut edge.  Stamp flower onto cardstock then color with copics.  Use diecut to cut flower, then attach bling.  Attach flower to ribbon with zip dry glue, then tie tag to ribbon with silver cording.  Secure tag on reverse with glue.  Use corner rounder to cut edges of card.

Please stop by Heartfelt Creations blog to check out the other creations made by the other DT members!!!

Wednesday, April 11, 2012

Heartfelt Wednesdays...

We are pleased to present the Western Elements Collection. Escape to the western plains with the Western  Elements Collection. Featuring Grandpa's antique wooden carriage and super-sized mushrooms, this set will delight with a brand-new twist on a traditional theme. There are 5 new PreCut Stamp Sets and one beautiful new exclusive Spellbinders die designed for Heartfelt Creations.

Win the New Release: Leave a comment on the HC blog by April 17 to be eligible to win the entire release valued at $109.99. The winner will be announced on April 18 on the HC Blog. 


Hello Stamping Friends!  
This week I'm sharing a little card inspired by my college roomie...She's been posting away of Facebook that she's got a knack for finding these little gems in the woods.  She's a 'shroomin queen, I guess! 

When I saw the new morel stamps in the new HC collection, my mind hopped to Di's hunting adventures immediately!  So this card was inspired by HER!!!  YOU GO GIRL!
 I wanted a shiny background so I stamped the windmill blades with Versafine then added clear embossing powder.
Here are the rest of the details...
HCPC 3463 Western Elements Precut Set
HCPC 3464 Barnyard Eleemnts Precut Set
HCPC 3466 Alpine Bungalow PreCut Set
Zip Dry Glue


Other: Black cardstock, rust cardstock, cream cardstock, Bazzill Harvest card base, Clear embossing powder, Versafine Onyx Ink, Memento Tuxedo Black, Distress Ink:  Tea Dye, Frayed Burlap, Antique Linen, Black Tsukeniko Fireworks spray, Brown Colored Pencil, Copic Markers:  E00,50; W3; G21,94; YG03, 23, 63, 95, Ribbon
Bling


Directions:  Stamp mushrooms onto cream cardstock three times.  Color mushrooms with colored pencil and copics.  Color grass with copics.  Distress with Distress ink then stamp rope along edge.  Stamp morels with distress ink onto image.  Use corner rounder on stamped panel.  Spritz Black Fireworks spray onto stamped panel.  Attach ribbon to edge.  Stamp black cardstock with Onyx ink then emboss with clear powder.  Crumple and apply to rust panel.  Attach ribbon along top edge and apply bling.


NOTE NOTE NOTE!!!


Limited Edition Products: We have added more products to our Limited Edition section. These products will only be available until April 30th. So grab them before they are gone.  

Vote for your favorite Semi-finalists: We would love to have you particpate and vote your 5 favorite semi-finalists. Review each one of their blogs, CLICK HERE to view the complete list of semi-finalists and their blog links and then CLICK HERE to submit your vote. When you vote, you will also be entered into a drawing to be eligible to win a $50 HC Gift Certificate. You can only vote one time and you have to select 5 or more to be eligible to participate. Voting ends on April 13th, 2012.

Vote for your favorite Designers (I'm hangin' up my hat this time!): When we announce a new design team call that also means that we have a tough time deciding which of the current designers continue on the HC design team. We decided to do things a little differently this time and are giving you the opportunity to get involved and vote for 5 or more of your current favorite design team members. You can CLICK HERE and submit your vote. When you vote, you will also be entered into a drawing to be eligible to win a $50 HC Gift Certificate. You can only vote one time and you have to select 5 or more to be eligible to participate. Voting ends on April 13th, 2012. 

SEE YOU NEXT WEEK!

Monday, April 9, 2012

Wedding Wishes...

Hey stamping friends!  Just stopping in to share a card I created for a coworker who is getting married soon.  Her shower is tomorrow so I told my teammates I'd do the shopping and make the card over Spring Break...Well, leave it to me to do it the last minute...but it's done!  Based on all the reminders and the invitations to her shower, I THINK these are her colors, but who knows!  Hopefully it's going to be the perfect match!
I used a combination of stamps and manufacturers for this card and you know, it's really kinda fun to not have to limit myself to single manufacturer stamps on my cards.  So here are the deets:


Ink (background) Memento Sweet Plum
Ink Sentiments:  Versafine Onyx
Sentiment (outside):  Woodware USA
Sentiment (inside):  Heartfelt Creations:  HCPC 3404 Wedding Sentiments Precut Set
Background Flowers:  HCPC 3439 Flirty Fluers
Cardstock:  Bazzill Plum, Kraft, Raven
Ribbon:  Light purple silk, satin plum Michael's
Bling:  Colored with purple Copic
Flower:  Prima
Have a great week!!!

Wednesday, April 4, 2012

Heartfelt Wednesdays...


Happy Birthday!

HCPC 3457 Birch Tree PreCut Set
HCPC 3460 Morning on the Farm PreCut Set

Other:
Kraft Cardstock card base A2
The Paper Company Cottonwood paper (inside layer)
Patterned Paper:  Fab Scraps:  Timeless Travel Stamp
Memento Tuxedo Black, Ranger Tea Dye Ink
Copic Markers Y26, YR20
Pop Dots
Lineco PH Neutral PVA bookbinding glue
Hemptique hemp cording (brown)
Karen Foster Charm Pin Up Brads
jeans material
machine thread
Directions:
Repeatedly stamp birch trees onto center portion of kraft card base.  Apply patterned paper strips to the bottom and top edges with glue.  Attach Jean material strips to inside edge of patterned paper using PVA glue adhesive.  machine stitch fabric to secure, then fray edges with fingernail.  Attach cording and decorative brad.  Stamp sentiment onto cottonwood cardstock then color with Copics.  Cut sentiment out and distress with tea dye ink then attach to card with pop dot.  Use corner rounder to round bottom edge of card, then distress edges with tea dye ink.

Wednesday, March 21, 2012

Heartfelt Wednesdays...Light your way...

 Hey stamping friends, Stopping in today to share a little project I created this past weekend.  I took a trip to IKEA to pick up a few shelves and odds and ends and headed to the marketplace to have a peek.  Found this LANTERN and KNEW exactly that it would work perfectly with the new My Guy Collection.  I couldn't beat the price ($3.99 USD!!!) so I picked one up, took it home and started playing.  I think a lantern like this on a Cowboy Country wedding would be fabulous, I can imagine a whole room of these lit up!

Here are tons of shots, but nothing is better than seeing it in real life.  head to a convention near you soon and you just might be able to see it!!!
 Picked the perfect sentiment from the sentiment collage!
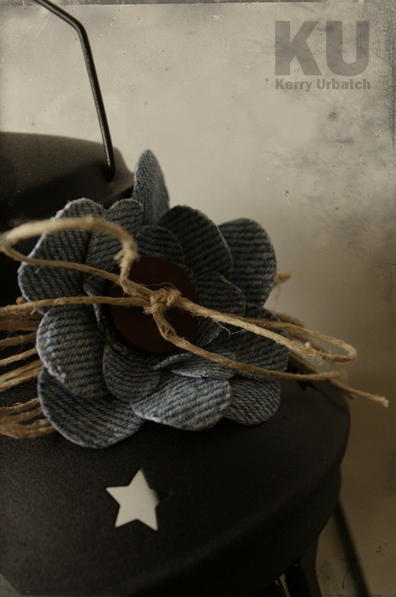
 Pretty country flowers made from an old pair of jeans and the HC exclusive posy die...
 Tiny horses, the big horse, horseshoes, boots...that's what you'll see gracing the glass panels...
 Wanted to leave the big horse uncolored.  I'd probably do a lot more of these lanterns uncolored, I think I like it better than the coloring.
A tiny battery operated candle flickering inside creates the perfect MOOOD...

Here are the specific details for this project:

HCPC 3462 My Guy Precut Set
HCPC 3457 Birch Tree Precut Set
HCPC 3456 Western Bronco Precut Set
HCD 701 Posy Patch Die
Grand Calibur

Other:
Lantern (from Ikea)
Twine
Jean material
Glossy Accents
Transparency film
India Ink
Copic Markers:  W-7; YG95; E29, 49, 57
Basic Grey Button (brown)

Directions:  Measure glass and cut transparency film to size.  Stamp images using India Ink.  Heat set carefully (just enough to dry ink).  Color on reverse of image with Copic Markers.  Attach transparency panel to inside of lantern inserting into existing clips/glass.  Cut flower petals from jean material then apply Glossy Accents to edges so they don't fray.  Tie twine bow around top of lantern, then attach flower with additional twine and bow.  Insert battery operated candle only.  Not suitable for real candle as the plastic transparency will melt.