Hello there inky friends! Sending special love and greetings to you as we celebrate this wonderful holiday season. While I'm out spending some time with family for Christmas and the New Year, I wanted to leave some love with you today because YOU ARE SPECIAL!
I created these two cards using the gorgeous floral digital set called Special You. If you're not a fan of digi images, you might be interested to know that this set is available in clear stamp form HERE as well. When purchasing any RGStudio360 stamps, you'll automatically receive the digital download for free! It's a TWO FER! Woop, woop! I used only the medium sized bud in the set and resized and layered this image multiple times (in Microsoft Word) to create a pleasing little frame for my sentiment.
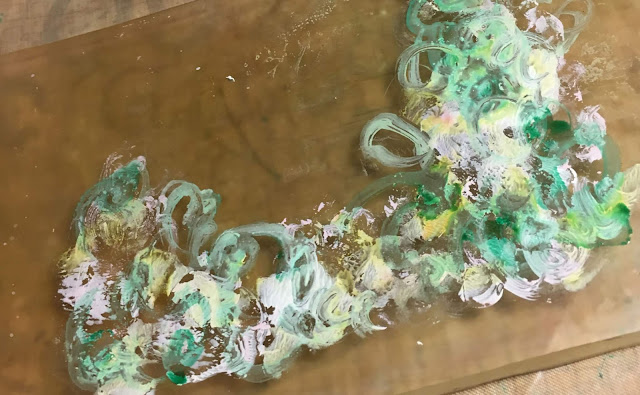
After creating the digital design/layout, I printed it on my computer and set it aside. I then went on to my background. I wanted to experiment a little with acrylic paints and inks to create a watercolory layer using my Gelli Plate. It took four layers to create this beauitiful background. I did not clean my plate between layers, I just used my paintbrush to make swirly designs in the same layout as the floral digi image panel.
Take a peek:
Layer one: Ivory acrylic paint and a little rosy pink...
Layer 2: Adding a little green...
Layer 3: Adding a little aqua...
Layer 4: Another pink layer to finish it off!
After creating the background, I splattered some metallic shimmer ink onto the panel with my paint brush then started working on the digi panel. I wanted to add a few tendrils and doodled elements so I took my Staedtler microfine pen .01 and doodled some images. I then colored the images with Leisure Arts colored pencils and applied Gamsol to blend.
After coloring, I spent some time in my comfort zone...Fussy cutting the image. Oh there's something about fussy cutting that just puts me into a relaxed state of zen. After fussy cutting, I applied some golden thread to the background panel just before popping the digi image onto the card then glued on the fussy cut sentiment. I made sure to add some embellishing touches of pearls and Nuvo Drops (Pearl). I mounted this panel onto some soft pink cardstock and then onto cream cardstock base (side fold).
Since my card design was digitally assembled in MSWord, I was able to make four exact images on one sheet of cardstock. This allowed me to have four panels...FOUR CARDS! WOO HOO.
For my second card, I wanted to keep it "somewhat" simple and just keep it to one layer- the layer I designed in MSWord. SOOO...I cut the panel into a perfect size (Slap my hand for not catching the fuzzies on the edge of my card...I need a new cutting blade on my trimmer!...OOPS!).
Anyway, I colored these images with watercolor pencils this time. I pulled in a bit more orange and some reds so it's slightly different than the previous color scheme. After coloring, I doodled again (I LOVE DOODLING!) and splattered some blue watercolor onto the panel. I also pulled out my White Gelli Roll pen and added some white here and there. You can see that in the close detail shots.
I think the white pen added some fun highlighting that is needed in this panel. As you can see the "scribbly" effect in the close-up, it is not noticeable when looking at the whole card panel. This Gelli Pen is not as intense as other white pens (more watery) so it allows for just the slightest highlighting possible. :)
ACK! Seee... THOSE edge fuzzies! AHHHH!!! I took care of them with my fingernail after I saw this close up shot! LOL. No worries, it's crisp and clean. :)Thanks for popping over. I hope you have a fabulous week and spend it with those you love. If you are hanging with yourself, that's ok too...You're special...Take some time to relax, and enjoy a few relaxing moments! See you again!


No comments:
Post a Comment