Welcome back to my blog! Today I'm sharing a few cards created and inspired by the March Challenge theme photo. I just love the colors and layout of this design and just had to create some cards inspired by it! Have you considered joining the Joy Clair monthly challenge? If not, please do. All you need is one JC stamp set and a little inspiration! :)
This special collection of projects featuring the Paisley Bouquet stamp set is definitely my favorite! This set has to be one of the most intricate and beautiful floral sets I've played with in a LONG time and I'm so in love! I love the variety of floral blooms and the stunning font. This IS gorgeous, don't you think?
Let's take a peek at my first card project, shall we?
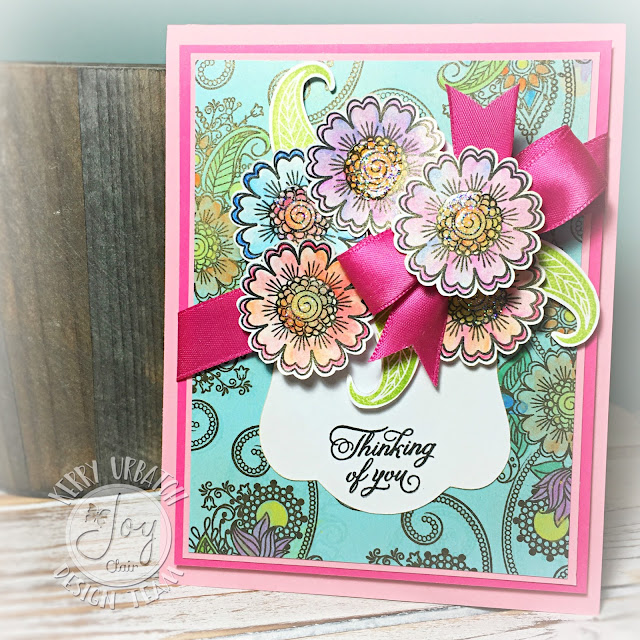
My project just blossomed as I completed watercoloring the base cardstock and the blooms. It's amazing how patience and perfect placement can create a gorgeous layout design. I tried so many different layouts of the watercolored blooms, but was not satisfied with any arrangement. Then I decided to cut out a white backgorund element using a stock image from my Silhouette Cameo and started laying out the pieces. Soon enough, I settled on the layout you see above. It makes me think of a perfect little posy pot and I was proud of myself for allowing the posies to guide my hands in perfect placement.
Let's dig a bit deeper into the process of creating this card.
First, I stamped the image using Memento Tuxedo Black ink onto some light blue cardstock. After that, I used my Staedtler Aquarell Watercolor pencils (I have a small 12 pack). When I watercolor on cardstock, I apply the color using a 00 size paintbrush and barely any water. I applied water to my brush, brushed the tip of the pencil to pick up some color and started coloring. I made sure the brush was not saturated with water so it wouldn't leave a pool of color on the paper. To me, an almost dry brush is perfect! I use this technique because I find I can control the "bloom" of the watercolor, it helps me avoid paper tears/curls and also allows me to determine where I want blending and shadowing.
After coloring the whole page, I rubbed some Gold PanPastel over that using my finger. That allowed my watercolor to appear less vibrant and more set into the background. I matted the inked panel onto light pink cardstock then onto some darker pink cardstock, then started coloring the flowers.
The flowers were watercolored in the same manner and PanPastel was applied over them after being fussy cut. I attached some foam squares to the back to give them some dimension on the card. Adding some sparkle to the center of each flower was next. I just love sparkle! After all the blooms were dry, I applied the white diecut, added some ribbon then attached the flowers with foam squares. The sentiment was the final touch to finish this card off!
After finishing my cards I usually have some strips of paper left over from "trimming". I decided to use them this time as the paisley pattern was too gorgeous to toss. Most times, I usually keep a stack of "strippy" extras and spend my Sunday's creating cards with my scraps. I recommend everyone do this. This is so fun and it's amazing how your scraps can become treasures in just a short period of time!
Take a look at my Scraps-to-Treasure card!
Easy, peasy...with a lot of punch! I spent a lot of time coloring those posies and I wasn't about to toss them in the trash!
I hope you enjoyed these creations and remember...Don't toss your scraps right away! Think about how they can be incorporated into a card. They're worthy of prominence on a card too! You'll see. :)


No comments:
Post a Comment